Setup
Before the character can be rigged a quick setup has to be performed, to register the geometry and shape of the given character. Perform the setup with care before moving on to the next steps. Make sure that your character meets the Requirements to Geometry.
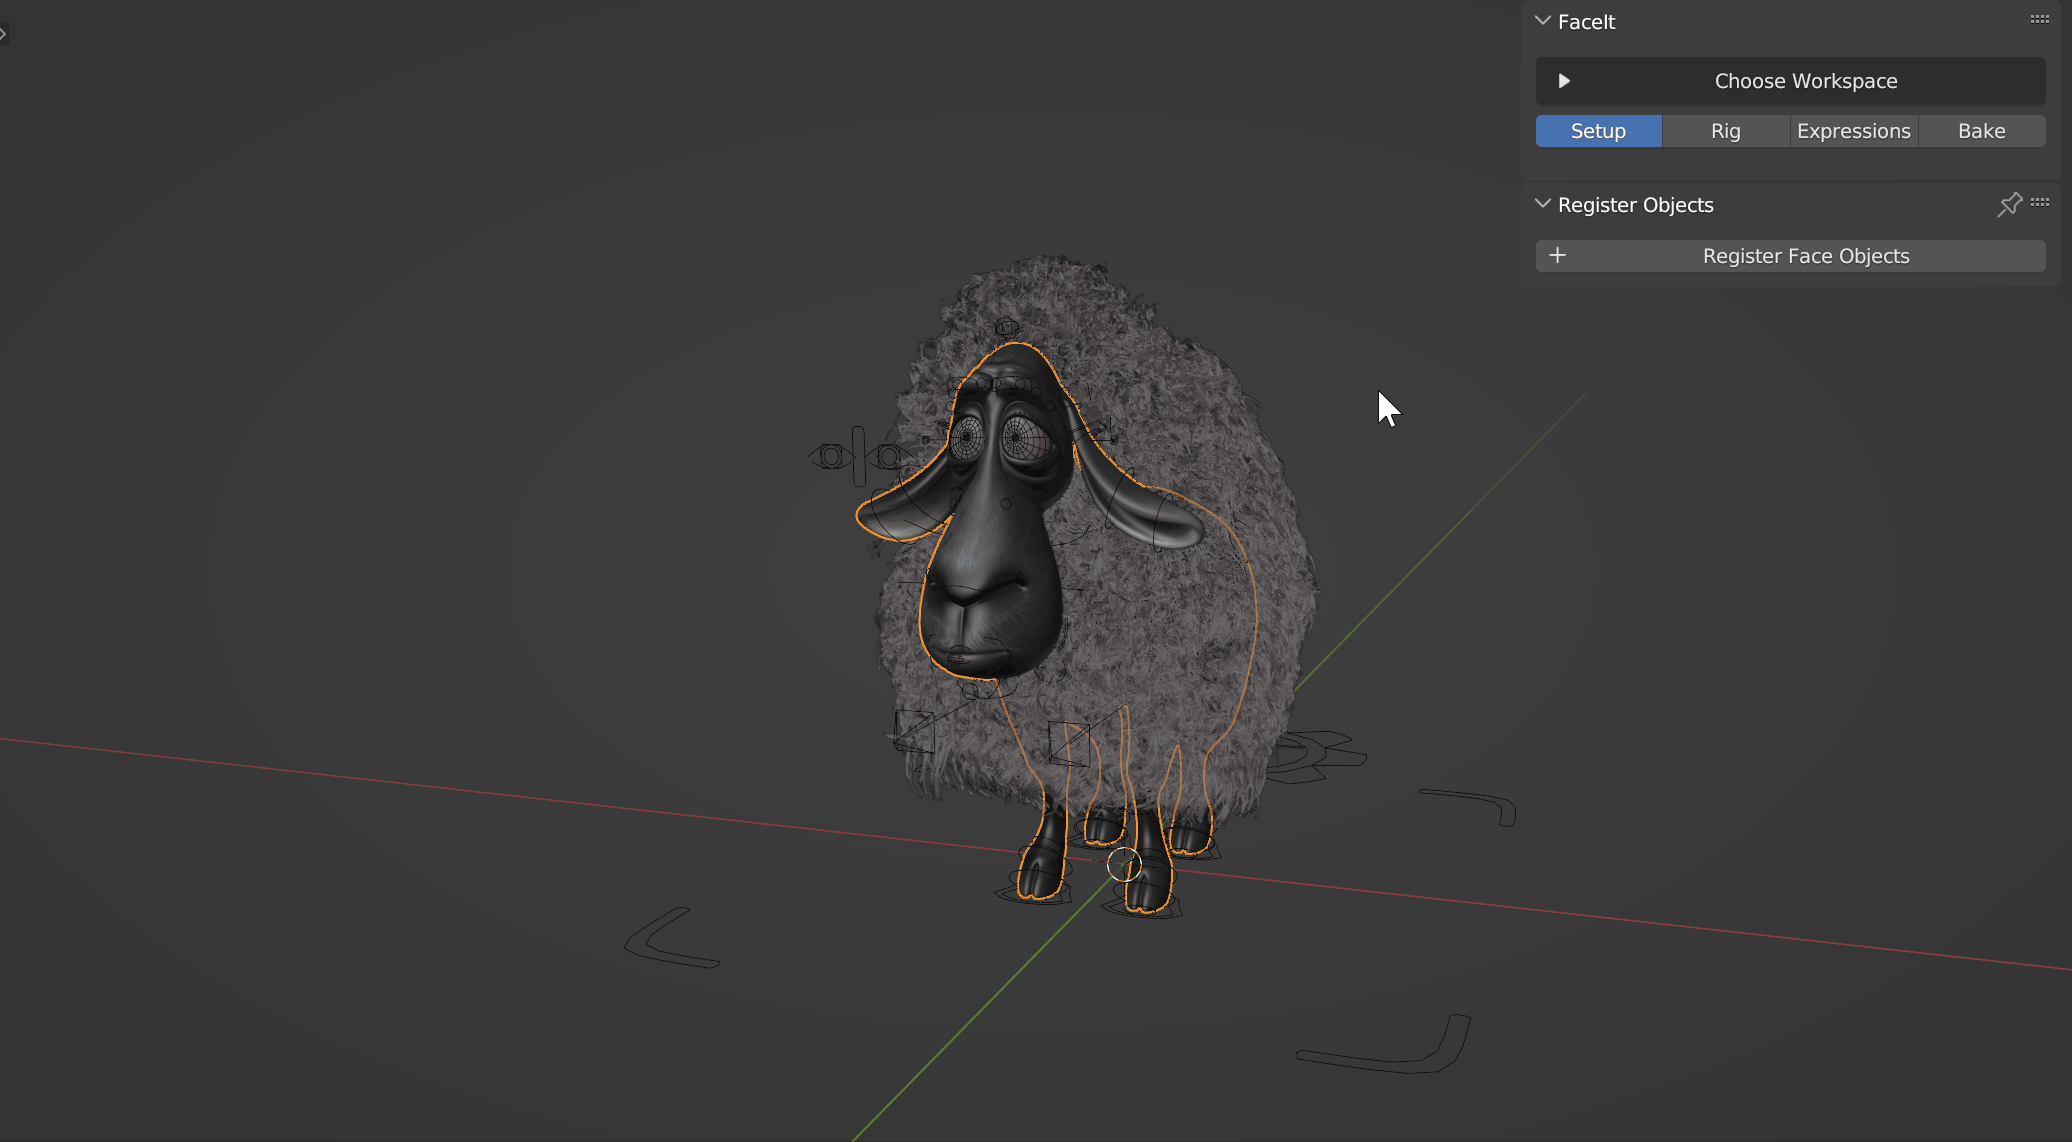
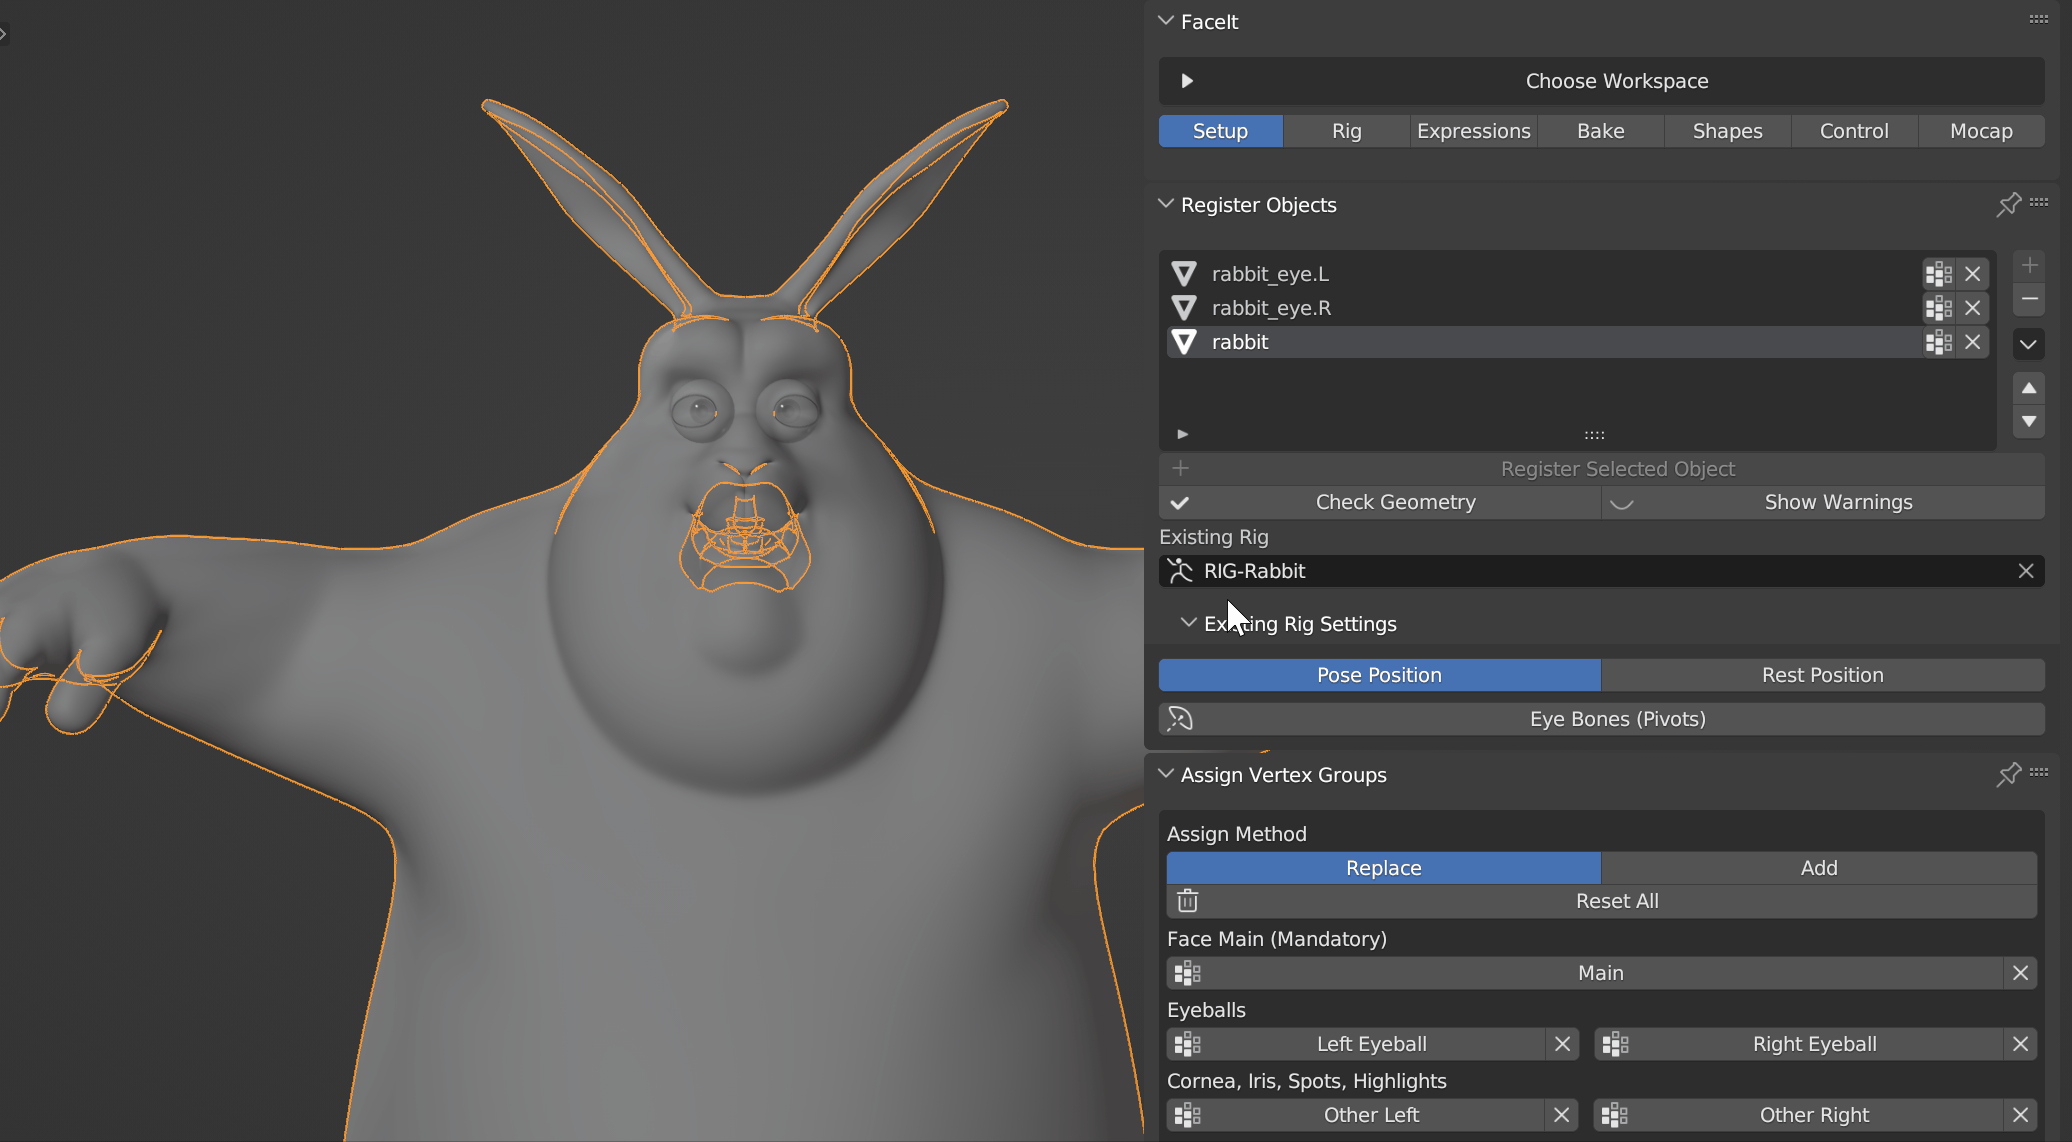
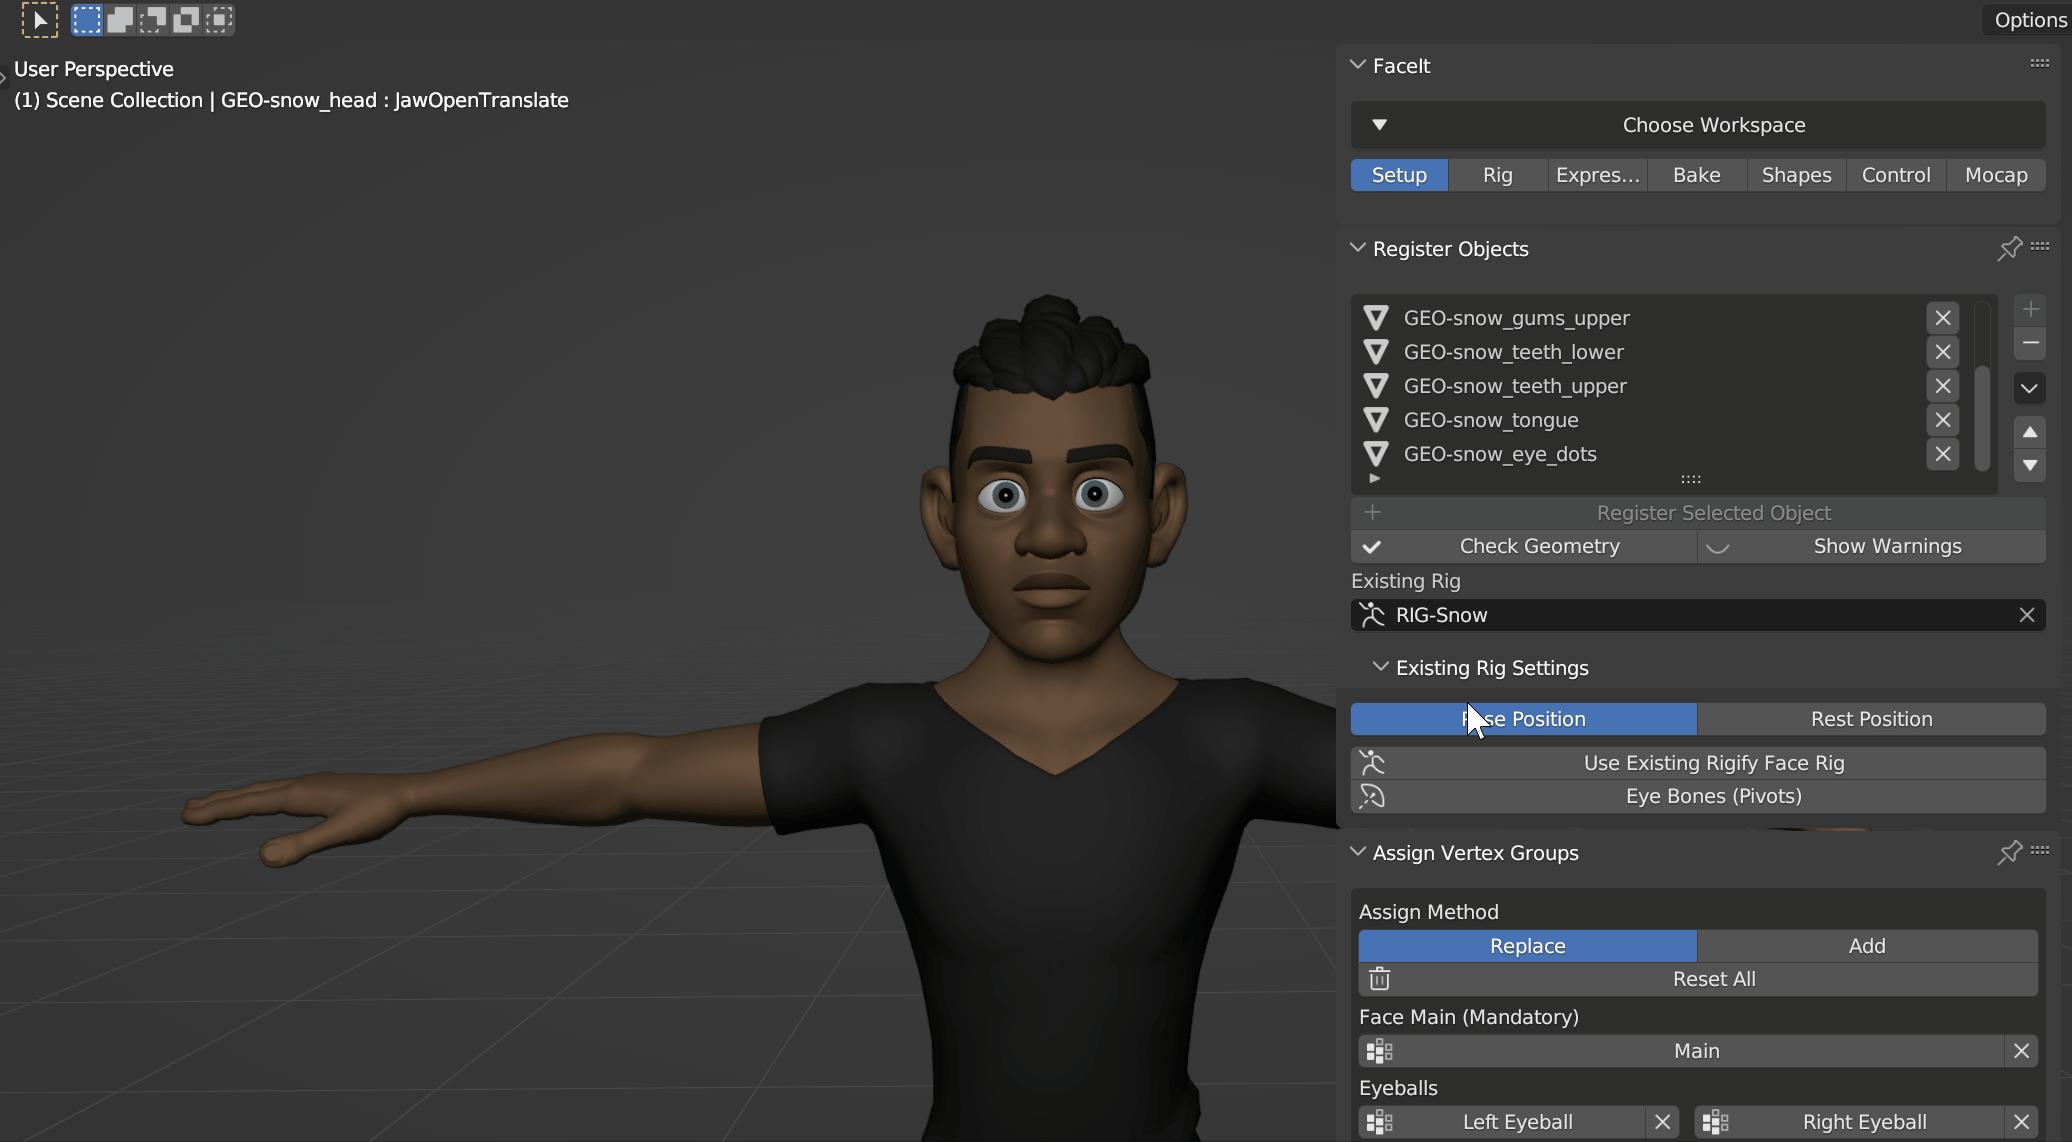
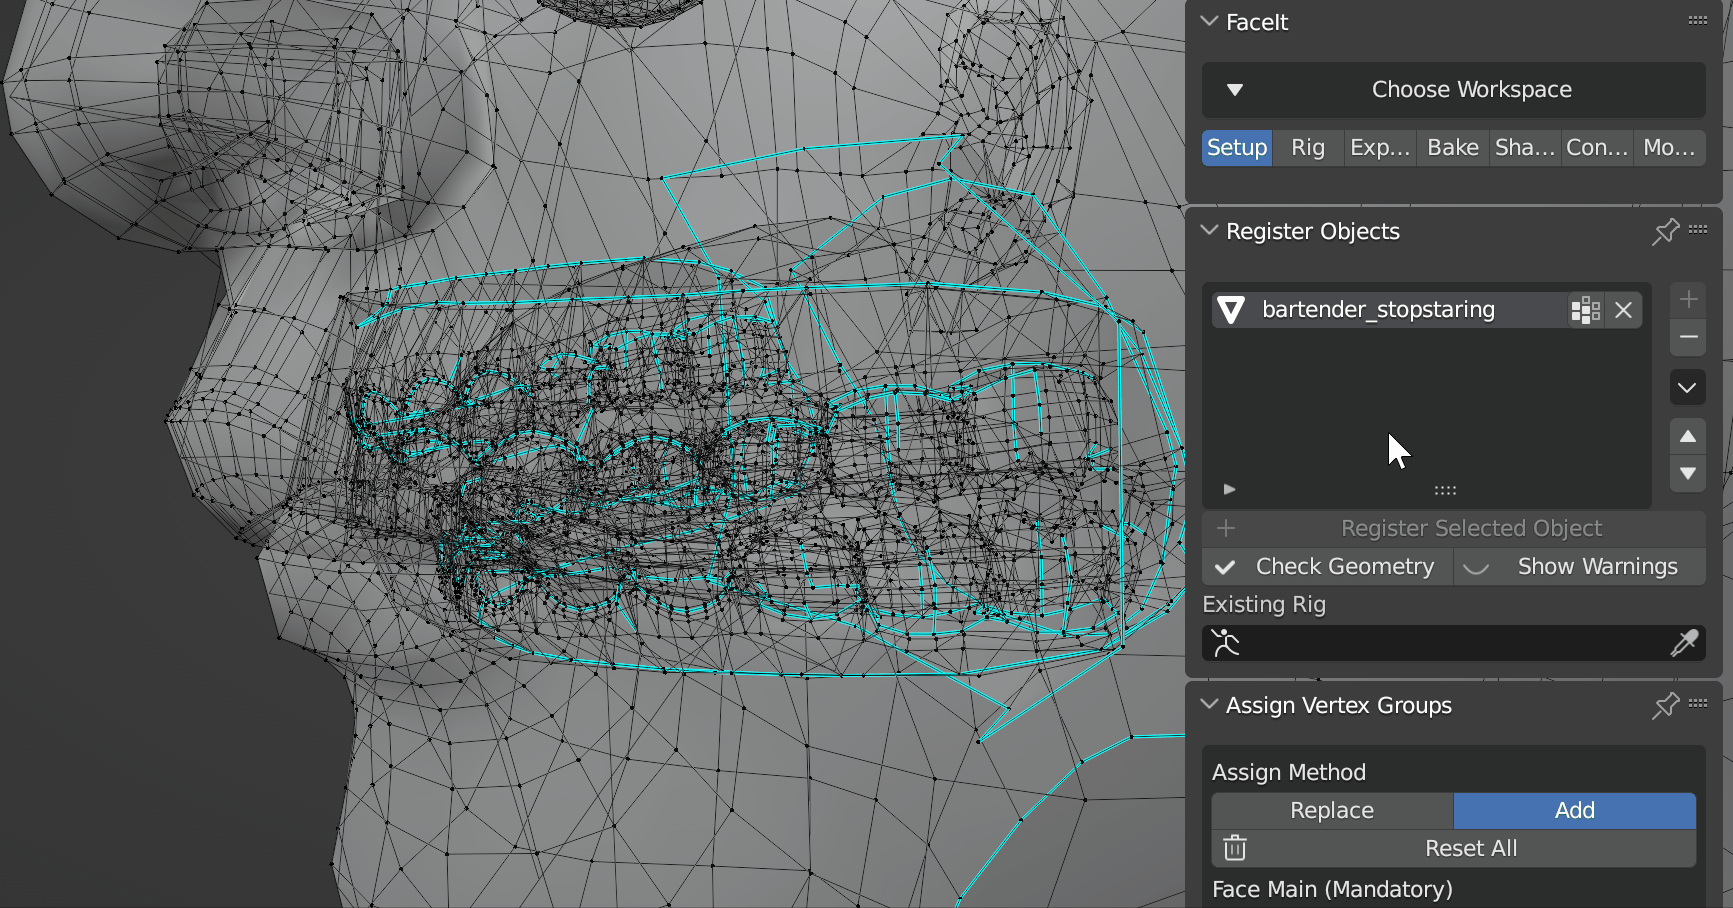
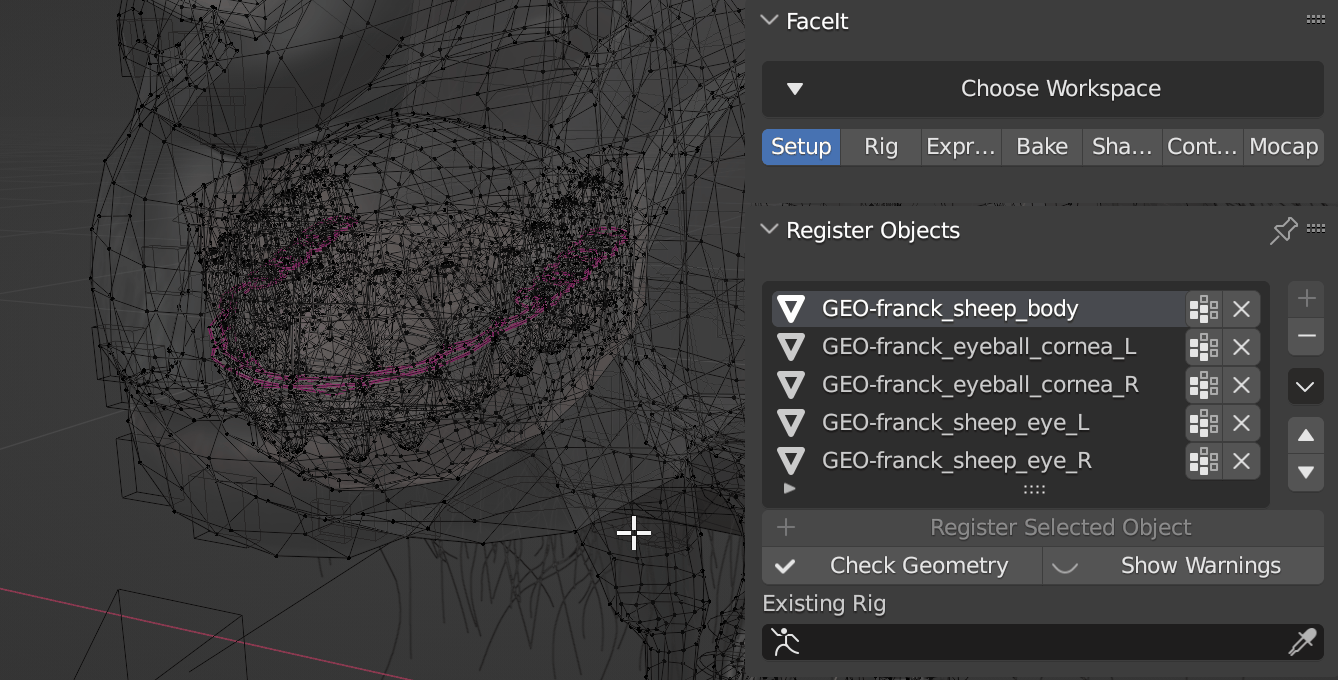
Register Geometry
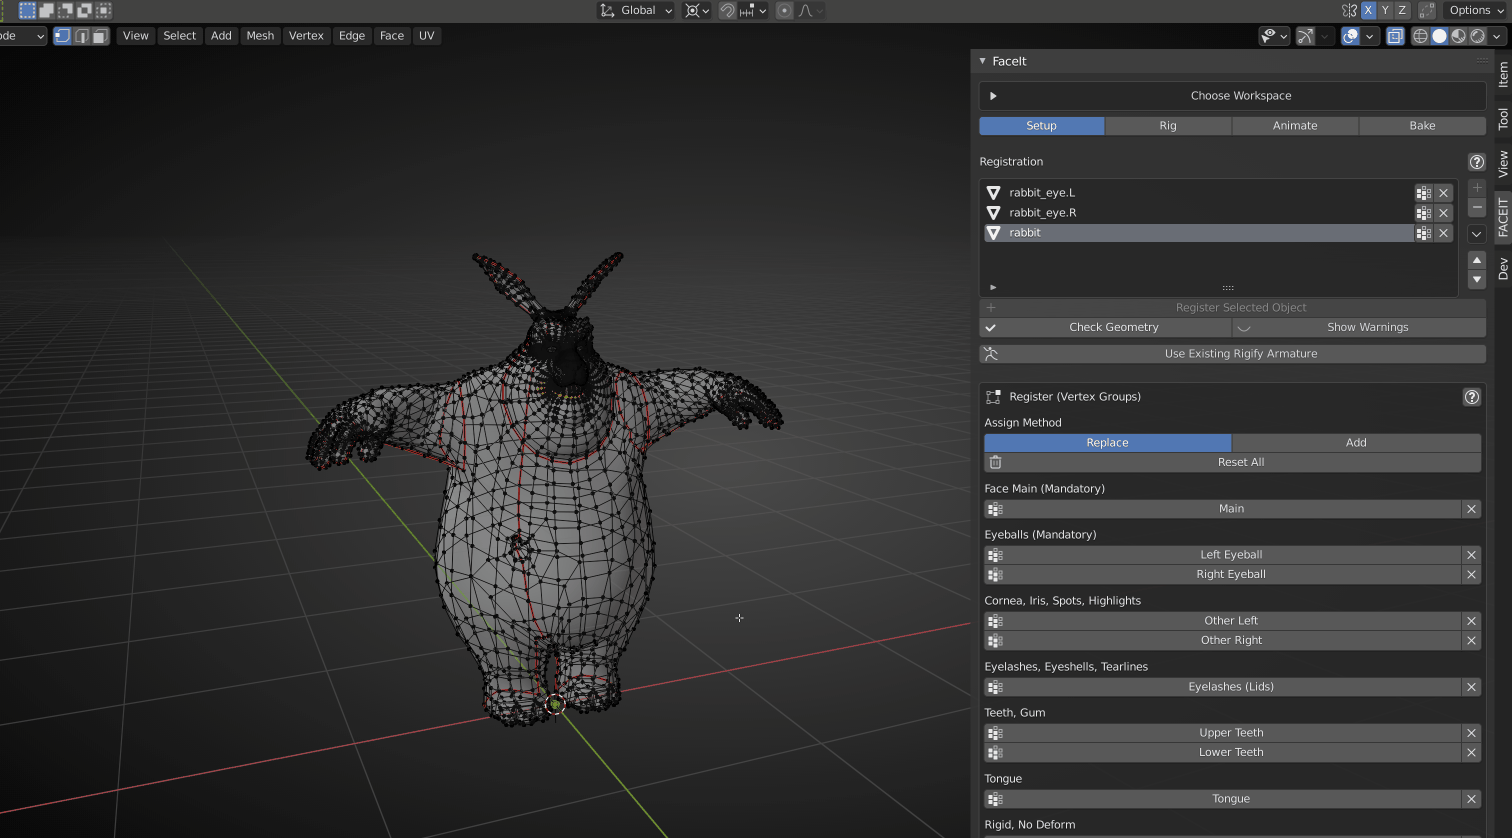
The facial objects that are supposed to be rigged or animated need to be registered in this step. Select the relevant objects and hit the Register Face Objects button!
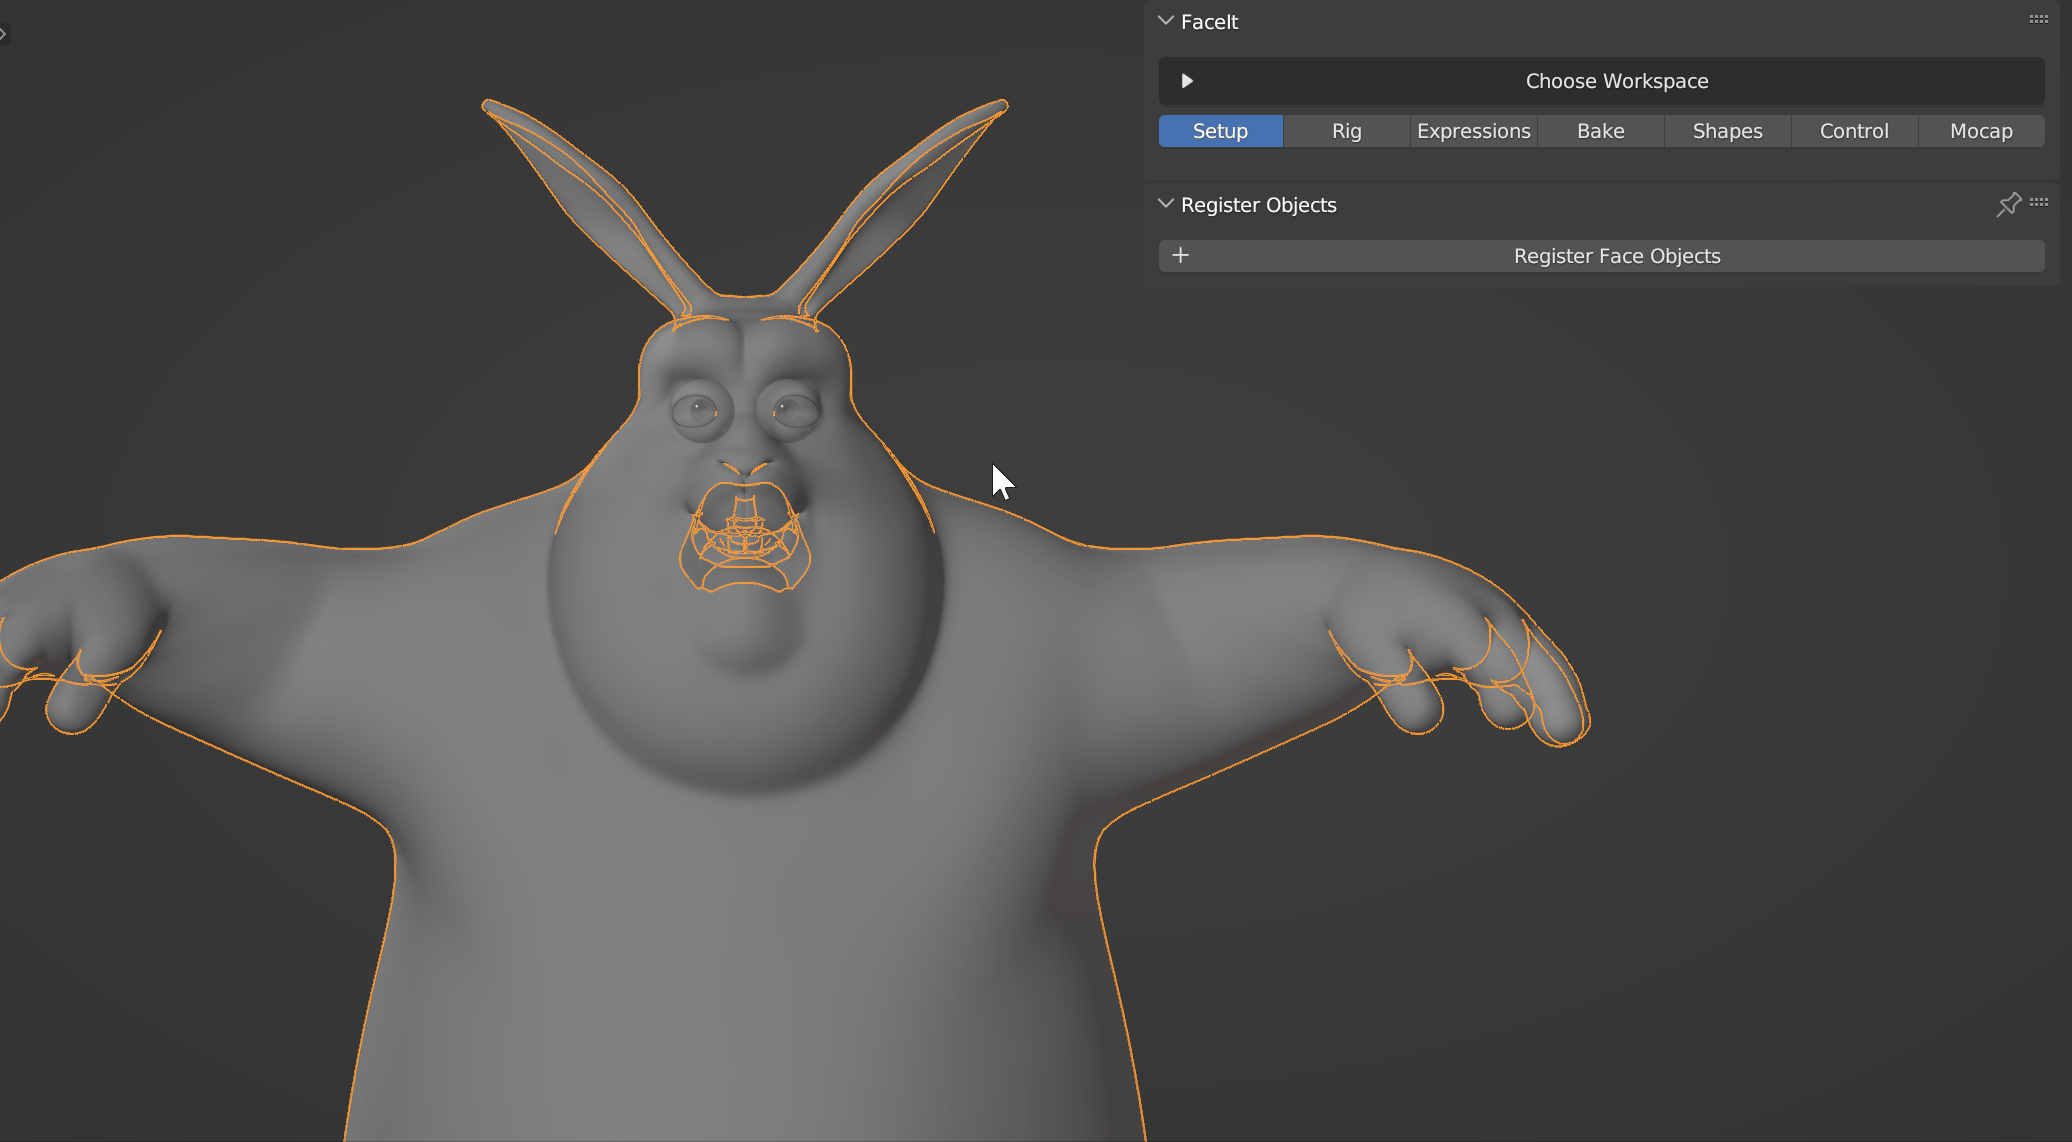
Register all objects that contain the facial geometry. Mesh composition might be different on your character.
You can add and remove object later on if necessary.
Only Motion Capture?
Assigning groups is only necessary if you mean to create the face rig or expressions for your character. If you only want to animate your existing FACS based shape keys, you can head straight to the mocap workflow.
Check Geometry
The Check Geometry operator allows to quickly check the registered objects for common errors and problems, before starting the rigging process. You can click the little warning icon next to an object in order to read a specific warning. Check the Prepare Geometry section for more information or reach out if you need help.
Use the Check Geometry operator for finding common errors.
Each Warning is displayed along with a comprehensive text and sometimes even solutions.
Use Existing Face Rig
In case your character is already bound to a face rig, you can register it in the Existing Rig field. If the rig is a face rig, you can check the Use Existing Face Rig option and head directly to generating the expressions. If it's a Rigify face rig, it will support the presets included in Faceit, otherwise you need to create the expressions yourself. If you got multiple characters with similar rigs, you can export the custom expression sets and re-use them on your other characters.
Register Control Bones
Before loading expressions you should specify the facial control bones of your rig. This ensures that Faceit can add rest pose keyframes inbetween expressions.
Use any custom rig for creating the expressions.
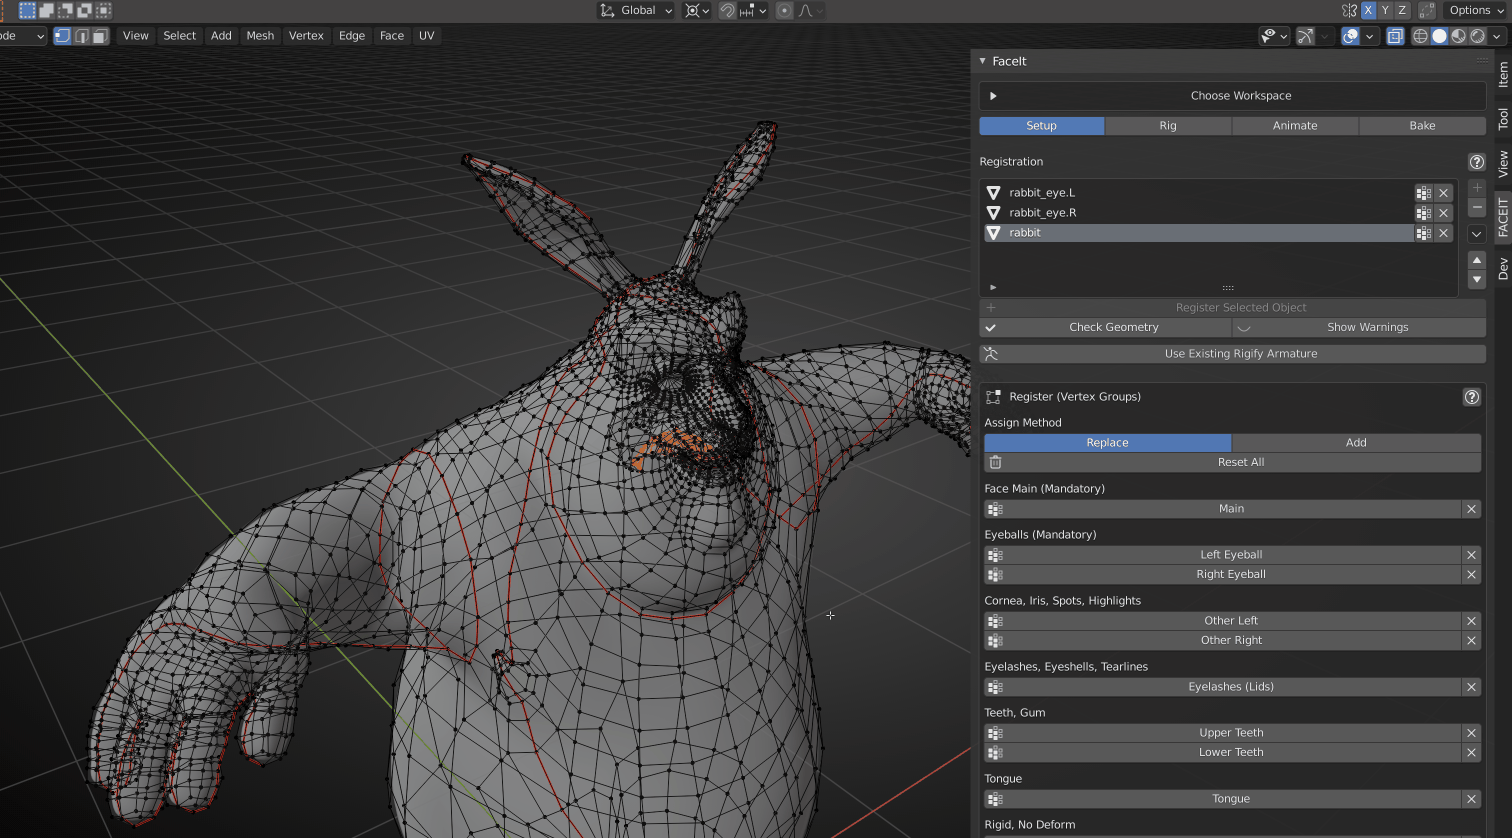
Assign Vertex Groups
In this step we will specify important facial parts, by assigning the associated vertices to vertex groups. Faceit will use the vertex groups to find the correct pivot positions for the bones and assign the correct weights in the binding process. Read on below, to learn details about the individual groups and how to assign them correctly and effectively! There is a How to Assign section for each group showing examples and tips.
Vertex Group Picker
The easiest method to assign vertices to a vertex group is the picker. Currently, the picker can assign groups to all vertices of a connected surface (all vertices that are connected by edges) or an entire object.
You can switch between Surface and Object pick modes from the panel or interactively using the O and S shortcuts.
You can assign multiple independent surfaces from different objects. The active selection is highlighted in green.
Clear the last selection using Ctrl + Z. The H key allows to hide a surface beneith the cursor
Quickly assign groups to surfaces or entire objects.
The picker is an interactive modal operator, with context dependent options.
Manual Assign Mode
Alternatively, you can assign groups manually.
Object Mode Quickly assign all vertices of a selected object to a group in Object Mode.
Edit Mode Assign a selection of vertices to a group in Edit Mode. This allows assigning multiple groups within the same object.
Tips for Assigning Vertex Groups
Select Linked
While the Vertex Group Piker allows to quickly assign vertex groups to a surface, it is sometimes not suited for more complex geometry. The Select Linked operator is similar in the sense that you can quickly select connected vertices, but it offers better delimit options which can make the process of assigning the Faceit vertex groups much easier. Place the mouse cursor over the geometry that you want to select and hit L or extend a selection to all linked vertices by hitting Ctrl L.
Delimit that selection by assigned Materials, UVs, Seams, etc.
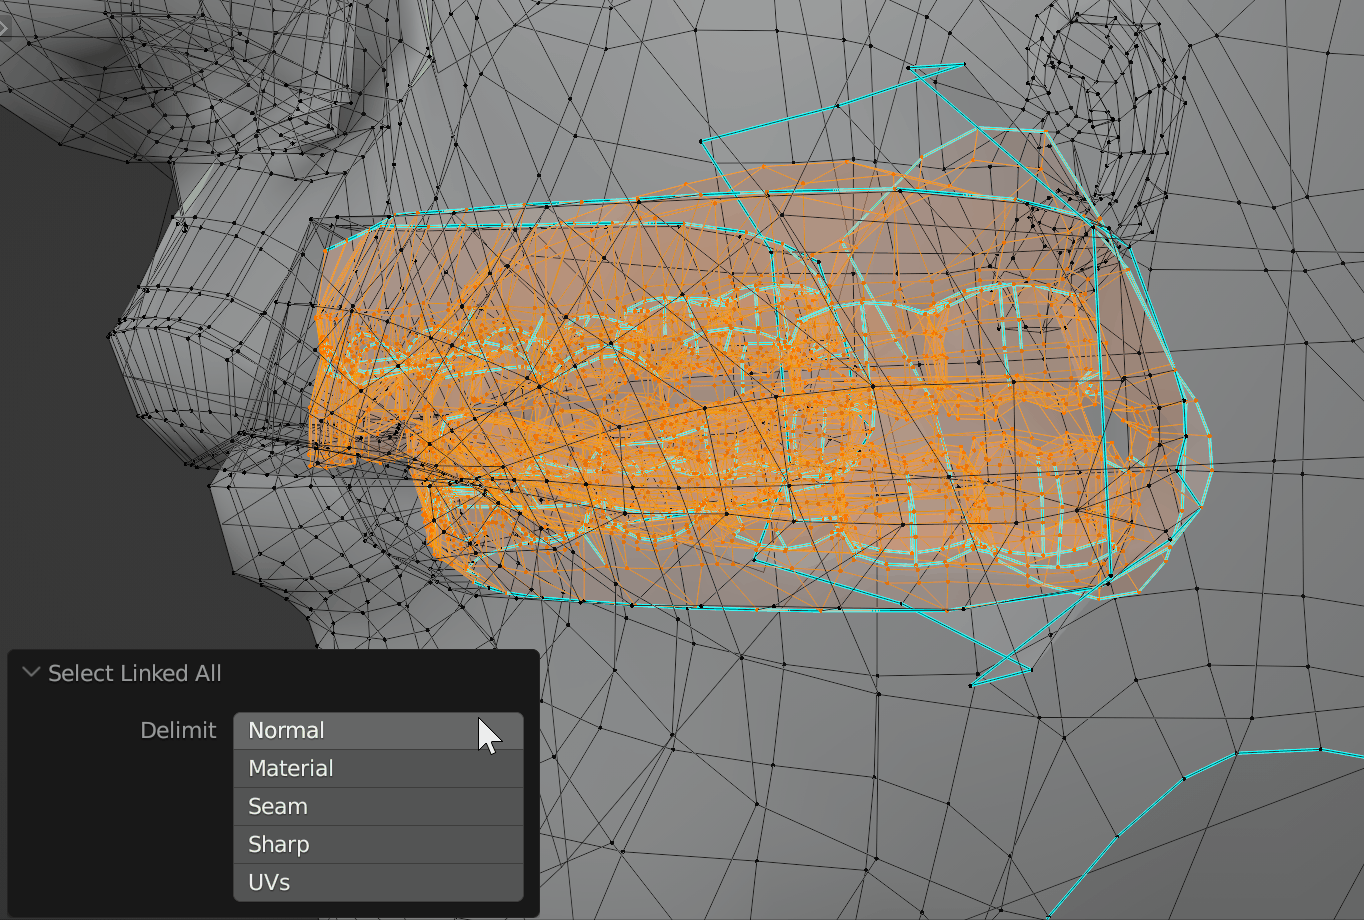
It can be very helpful to cycle through the Select Linked operators delimit options when making complex selections. In this example we can easily assign the tongue group using the UV delimiter.
Shrink & Grow Selection
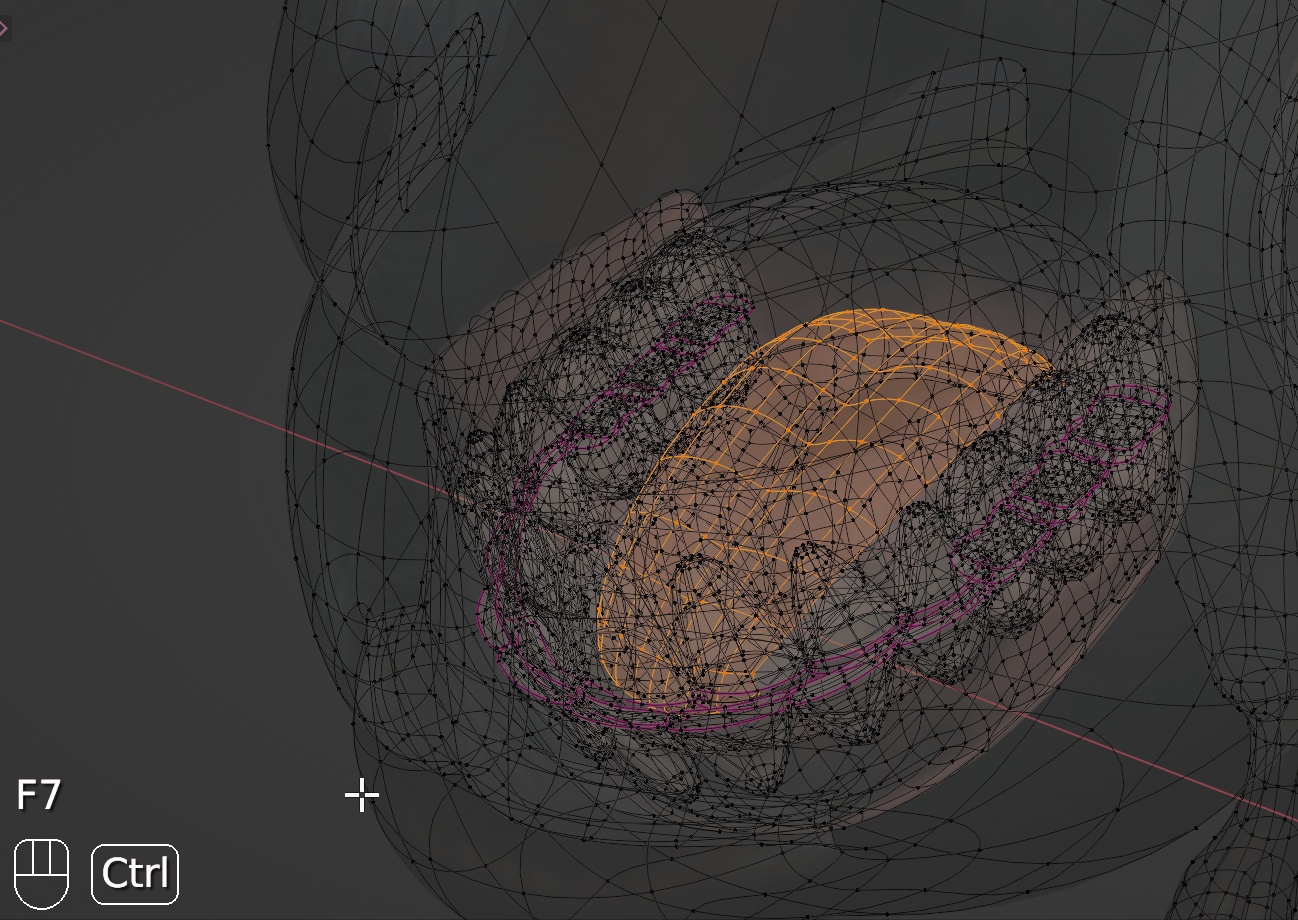
Shrink and Grow Selections with Ctrl + Numpad Plus / Ctrl + Numpad Minus.
Verify Vertex Groups
Quickly view and verify groups by clicking on the vertex group item next to the object in the list.
Alternatively you can also find the vertex groups in the object data tab.
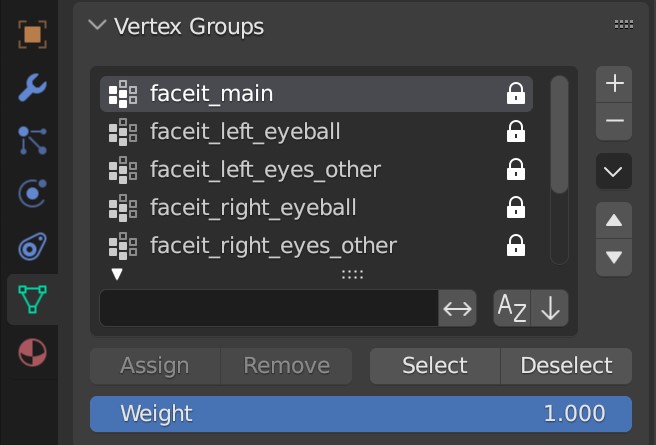
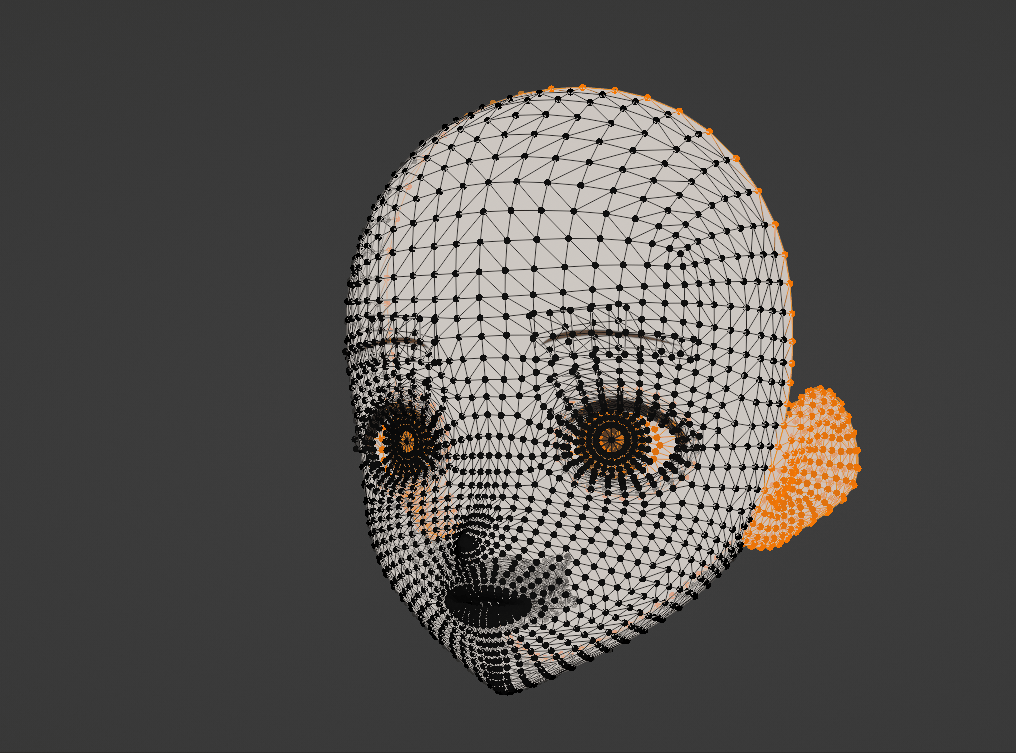
Main Group (Mandatory)
The most important group! It is used as the target surface in the Landmarks Projection.
Geometry (face, skull, body, skin) This group should consist of one connected surface. In other words, all vertices assigned to this group should be linked by edges. It does not matter if this encompasses the skull or even the whole body.
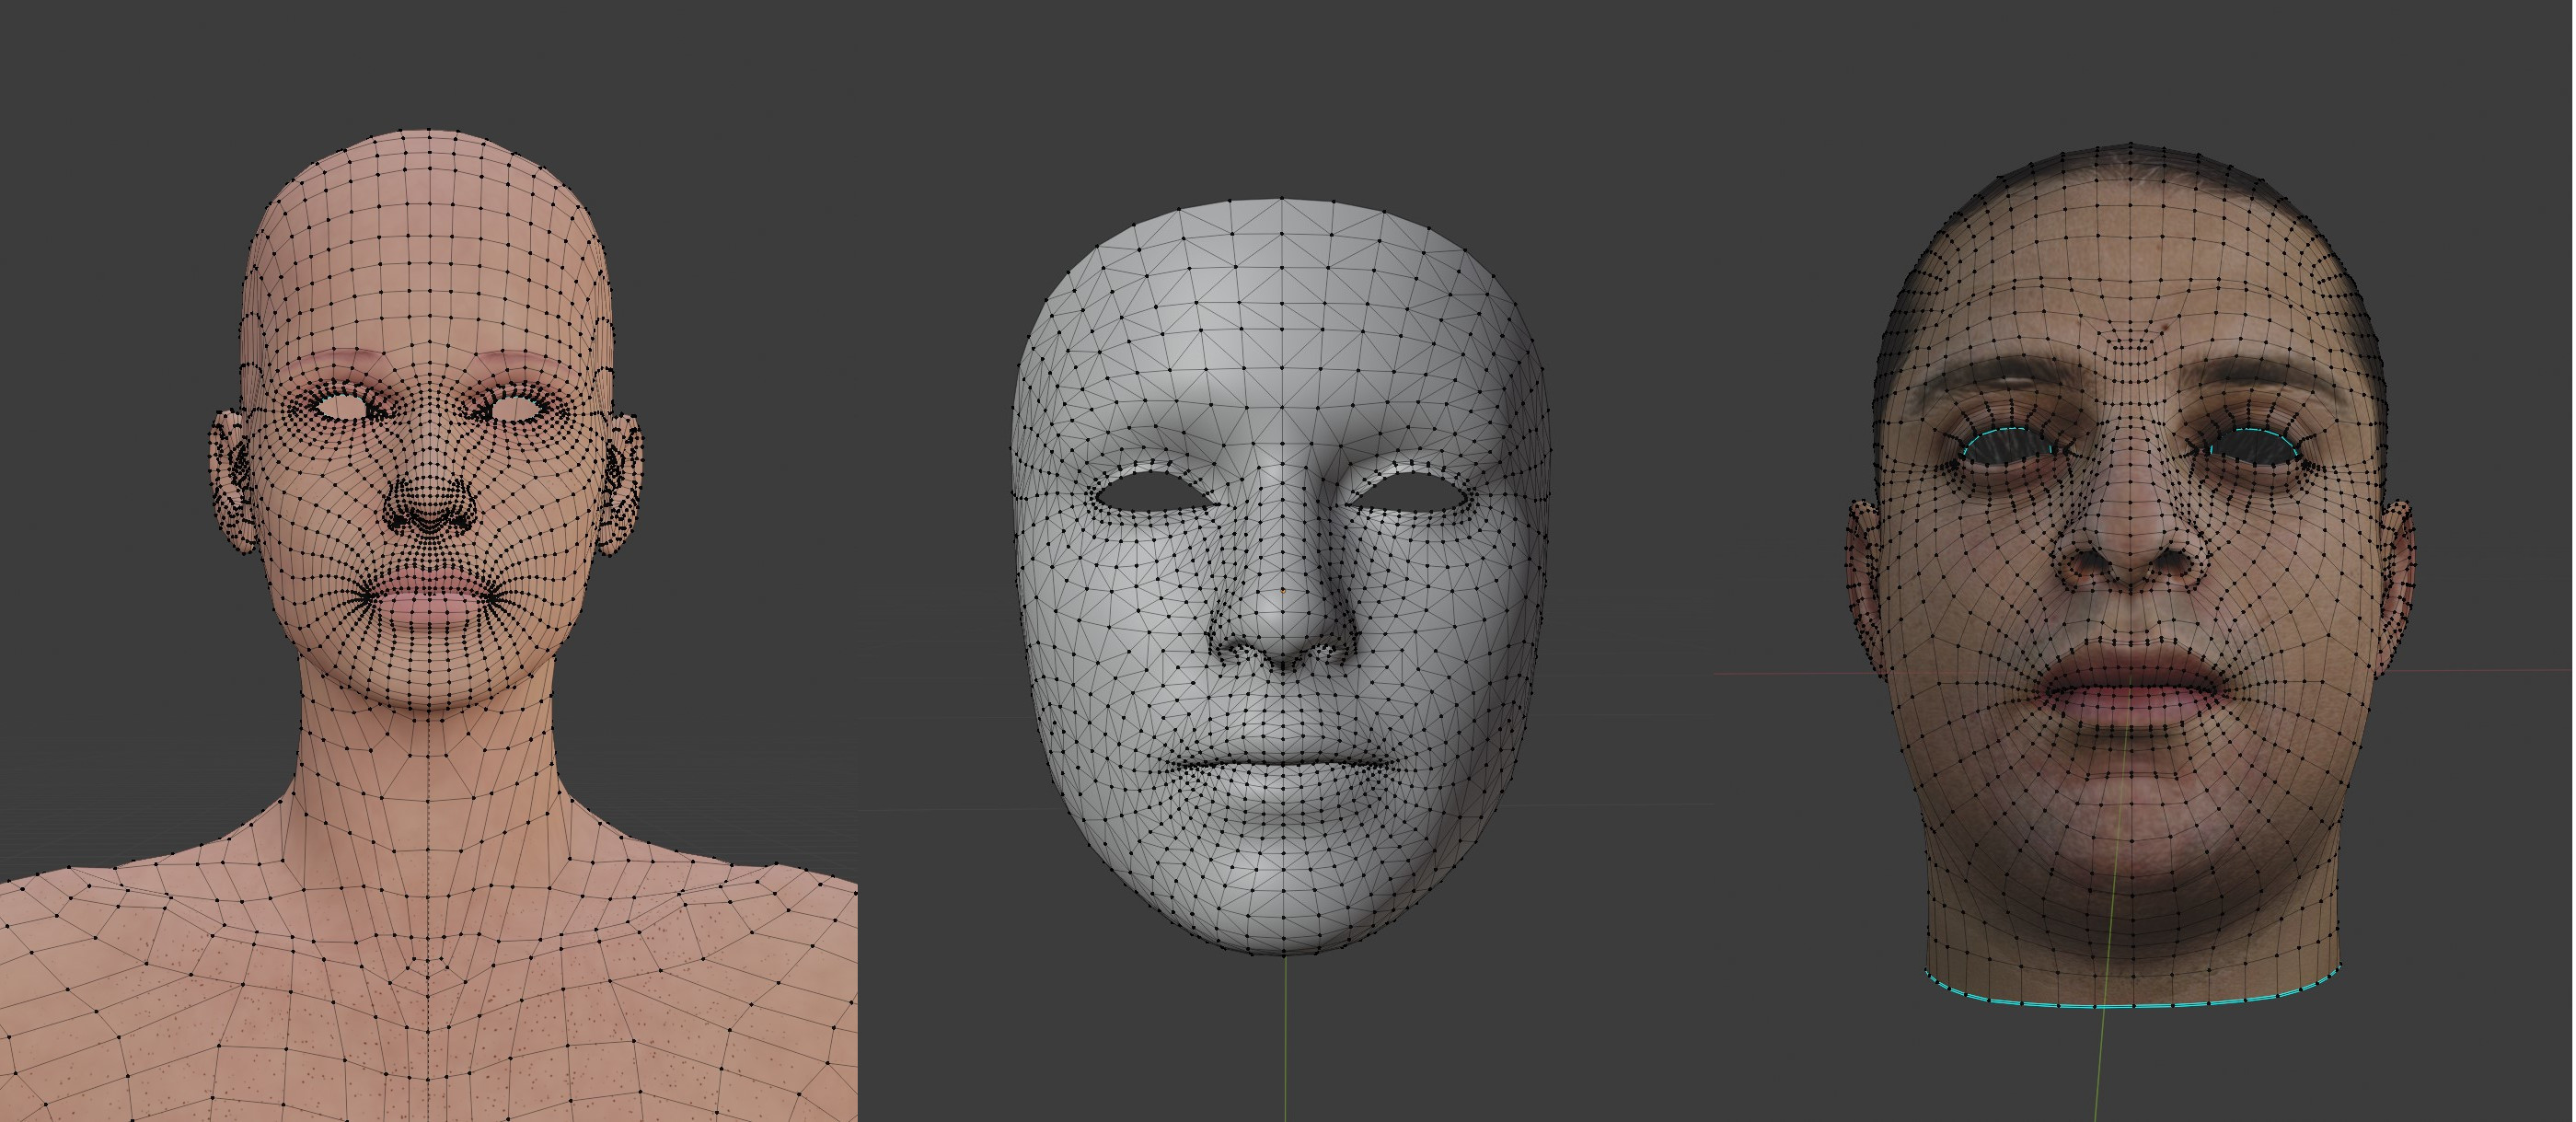
Example Images display only the main group.
How to Assign
Set the Vertex Group Piker to Surface and click anywhere on the skin of your model.
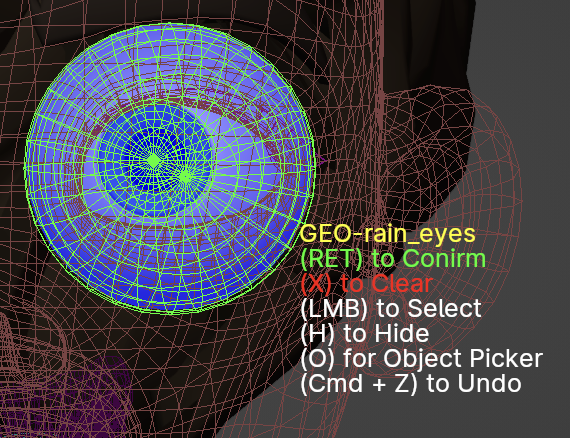
Eye Groups (Left and Right)
Assigned vertices will be weighted only to the respective deform eyebone. By default Faceit also calculates the pivot position for the eyebones based on the assigned vertex groups.
Geometry Eyeballs, Cornea, Iris, Pots, Highlights, flat eyes, ...
How to Assign
Set the Vertex Group Piker to Surface and assign all surfaces that are part of the eye/eyeball.
Teeth Groups (Upper and Lower)
Geometry that should deform rigidly along with the teeth/jaw. This group is used both for placement of the teeth bones and for the weighting. Any vertices assigned to either group will be weighted only to the teeth deform bones (weight 1.0).
Geometry Upper & Lower Teeth, Gum, Mouth Interior...
Assign lower teeth group in main object.
It can be tricky to make the individual vertex selections.
How to Assign
If the teeth geometry is isolated in seperate surfaces, you can simply use the vertex group picker to assign the vertex group. If the teeth are grouped with other geometry in one object, you will need to select the teeth vertices in edit mode and only then use the assign operator. It can be one of the trickiest parts of the process to assign the teeth and tongue groups correctly, especially when they are all connected within an object along with gums and other mouth interior. It's often helpful to explore the various delimit options of the Select Linked operator and make use of the Shrink and Grow Selection operators to quickly select the correct vertices. Assigning the upper and lower part of the gums can help to avoid clipping of the teeth when the jaw is opened. All vertices in between upper and lower group will be smoothed between the two groups and the main weights. Take a look at the bartender blend file in the demo files here.
Tongue Group
The tongue geometry is used to determine the placement and weighting of all tongue bones. If this is not assigned to any registered object, the tongue bones won't be generated at all.
Geometry Tongue.
Assign tongue group in main object.
How to Assign
Assigning the tongue group can be equally tricky as assigning the teeth and the same difficulties apply if the geometry is connected to teeth and mouth interior. Read the How to Assign section for the teeth group above.
Eyelashes Group
Geometry that will only be weighted to the lid bones. The eyelashes geometry will receive weights, projected from the underlying main mesh. The differences to other facial hair geometry is that all weights that are not related to the eyelid bones will be removed. For some models it can be useful to assign other geometry like eyeshells or tearlines to this group.
Geometry: Eyelashes, Eyeshells, Tearlines...
How to Assign
If the eyelashes geometry is isolated in separate objects, you can simply select the object in object mode and click the Eyelashes button to assign the vertex group. If the eyelashes are grouped with other geometry in one object, you will need to select the eyeball vertices in edit mode and only then use the assign operator.
Rigid Group
Geometry that should not deform at all. It can be used to define static areas of the skull or the body, although Faceit should do a decent job of automatically removing weights from these areas. There are no hard rules for this group. It can be very helpful for some models and not necessary at all for others.
Geometry Anything that should not deform.
In this character the vertex loop around the face, the ears and the eye white are assigned as rigid, so they don't deform along with the rest of the mesh. (blend file in demo files)
Facial Hair (Optional)
This group is just added for convenience. Usually Faceit will automatically detect facial hair geometry and assign the correct weights. The advanced settings in the bind operator allow to only use the facial hair group for weighting and suppress the automatic detection.
Geometry Beards, Eyebrows, Tearlines,...