Motion Capture - Live Recorder
The Live Recorder allows to receive animation data from Face Cap, Hallway Tile, Live Link Face or iFacialMocap and animate the active character in real-time. Head rotation and location as well as shape key data can be animated and recorded in real-time. After stopping the receiver, the animation data can be imported directly into a Blender action, on the active character or the control rig.
Setup
- Make sure that your character is properly registered for mocap (see Mocap Setup).
- Both the computer running Faceit and the device running the capturing application should be on the same network or on the same device.
- Blender should be allowed to communicate in the firewall settings of your computer.
- Depending on your sending application settings, you might need to change the default port and address settings.
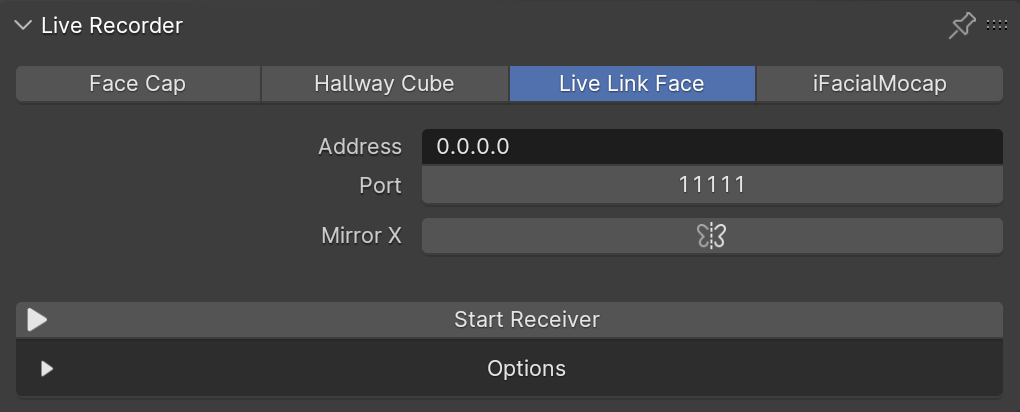
- Leave the address field at the default
0.0.0.0to make sure that all data on your network is received. To receive data from a specific device only, enter the IP-address of that device in the Address field. - Enter a specific port or leave it at the default for each app (It's important to send and receive on the same port).
- See the Network Troubleshooting section below for common issues and how to solve them.

Address and port settings in Faceit.
Application Settings
Face Cap
Read more about Face Cap App here.
- Tap the
Go Livebutton in the Face Cap main menu. - Tap the
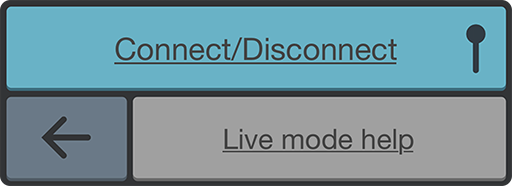
Connect/Disconnectbutton in the following menu. - In the
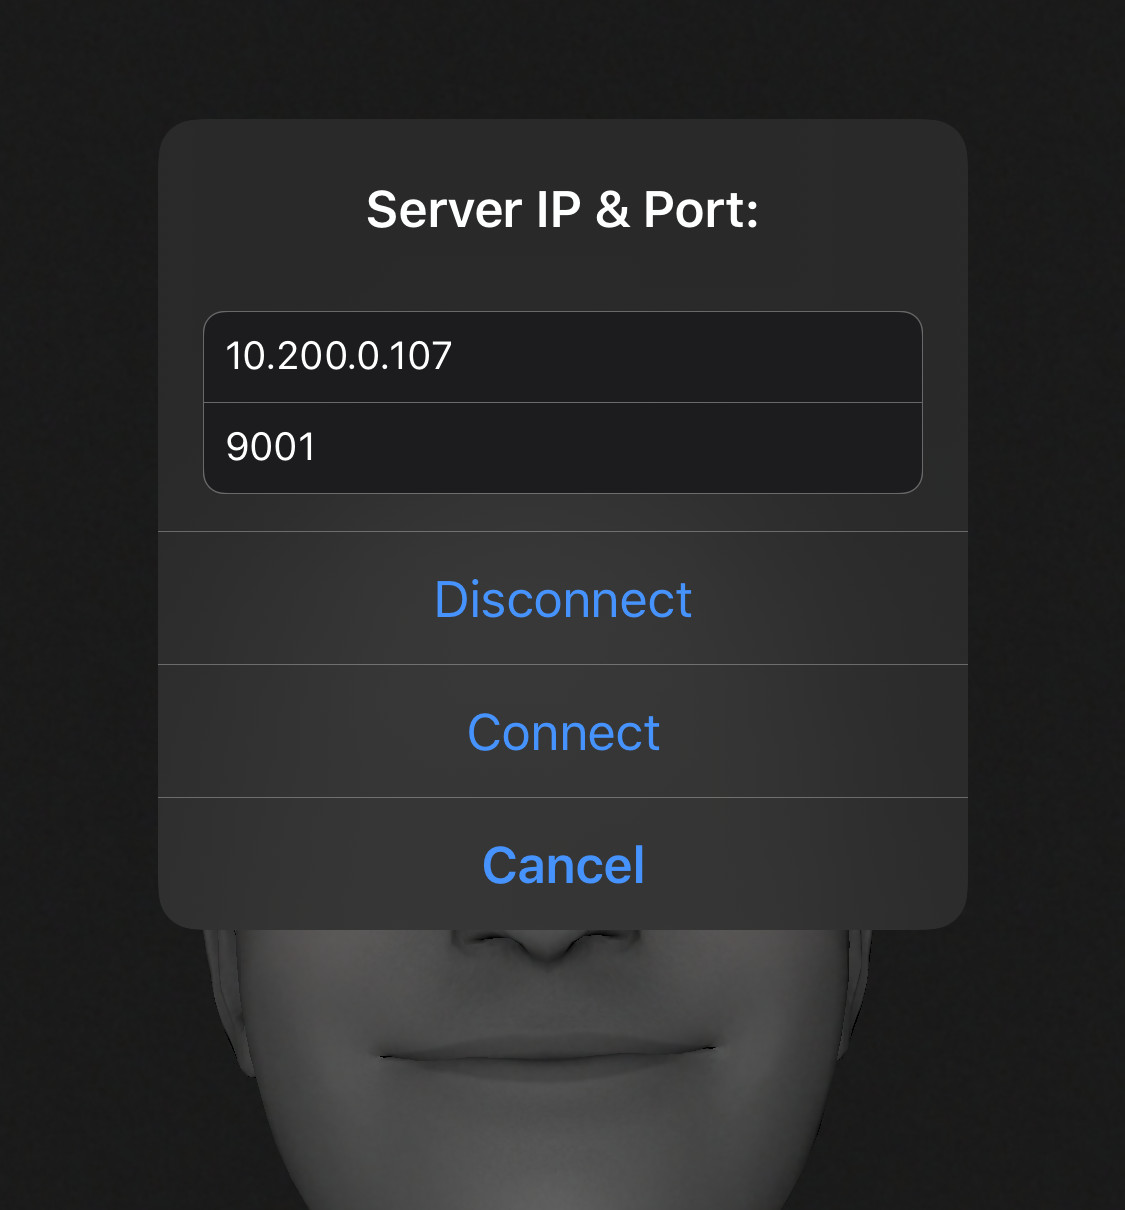
Server IP & Portsettings that pop up, do the following.. - In the first field, enter the (local) IP-address of your PC/mac running Blender.
- In the second field, enter the same number that you entered in the Faceit port field (default
9001). - Hit
Connectto start streaming data to the PC. - Start the receiver in Faceit.
In-App Purchases
The Face Cap app itself is free-to-use, but the live streaming functionality is time capped to 5 seconds. You can unlock unlimited streaming via an in-app purchase (34.99$ - price may vary based on your region).
Connect/Disconnect: Opens a popup to start or stop a live mode sesstion.
Enter IP address of your PC and the same port as in Faceit.
Live Link Face
- Go to Settings.
- Make sure the capture mode is set to
Live Link (ARKit). - Under
Streaming/Live Linkadd a newtarget. - Enter your PCs
IP address. - Leave the port at
11111if you don't have a specfic reason for changing it. - The live link face app is sending to the targets by default. There is no need to start the process.
- Start the receiver in Faceit.
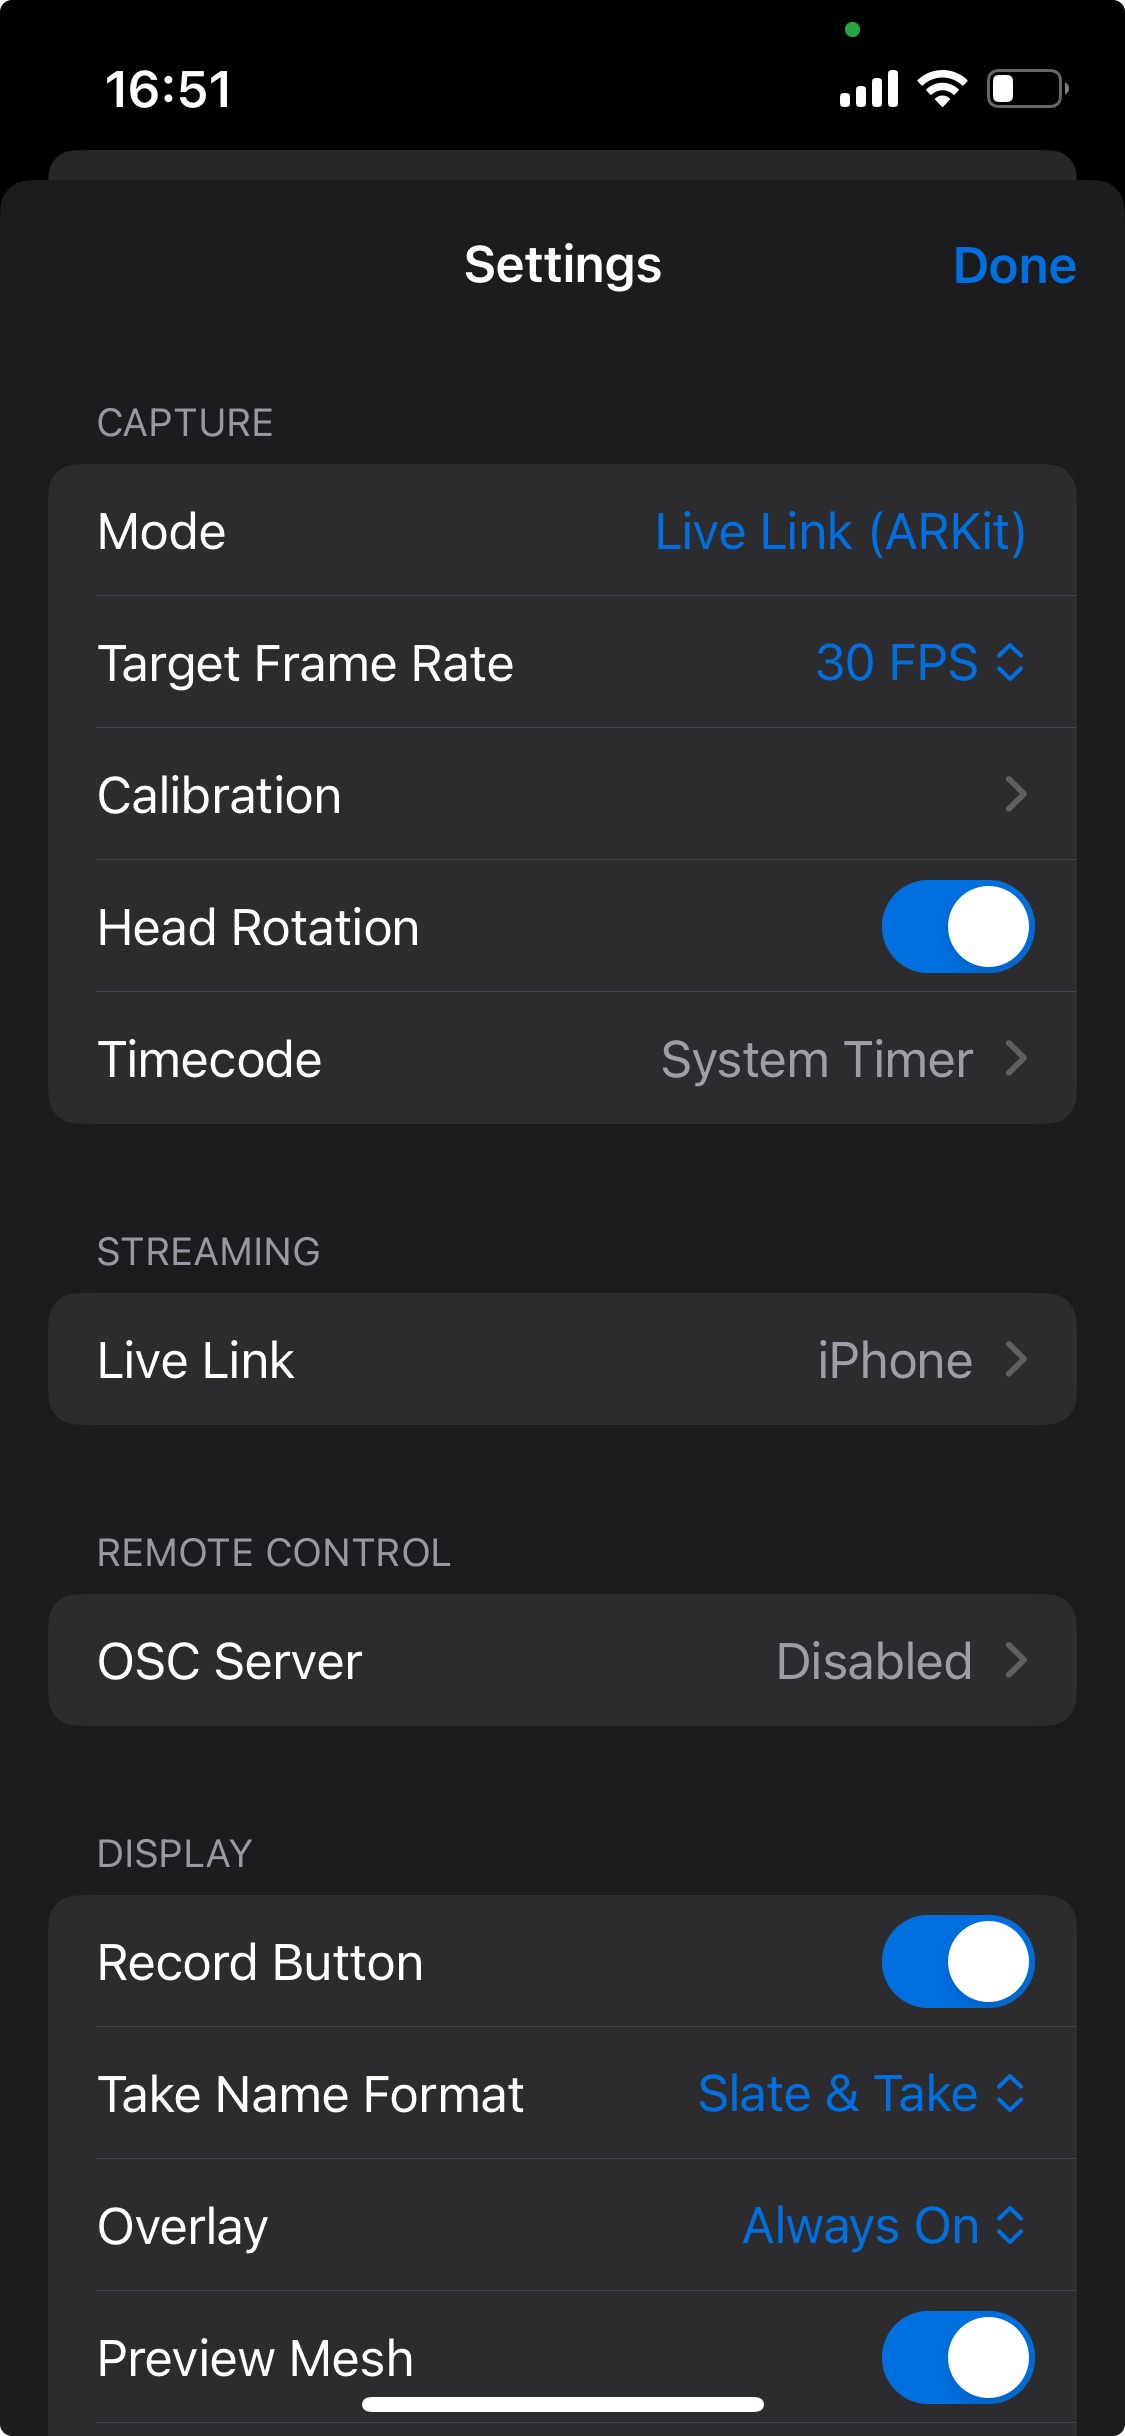
A quick setup is required before the data can be received.
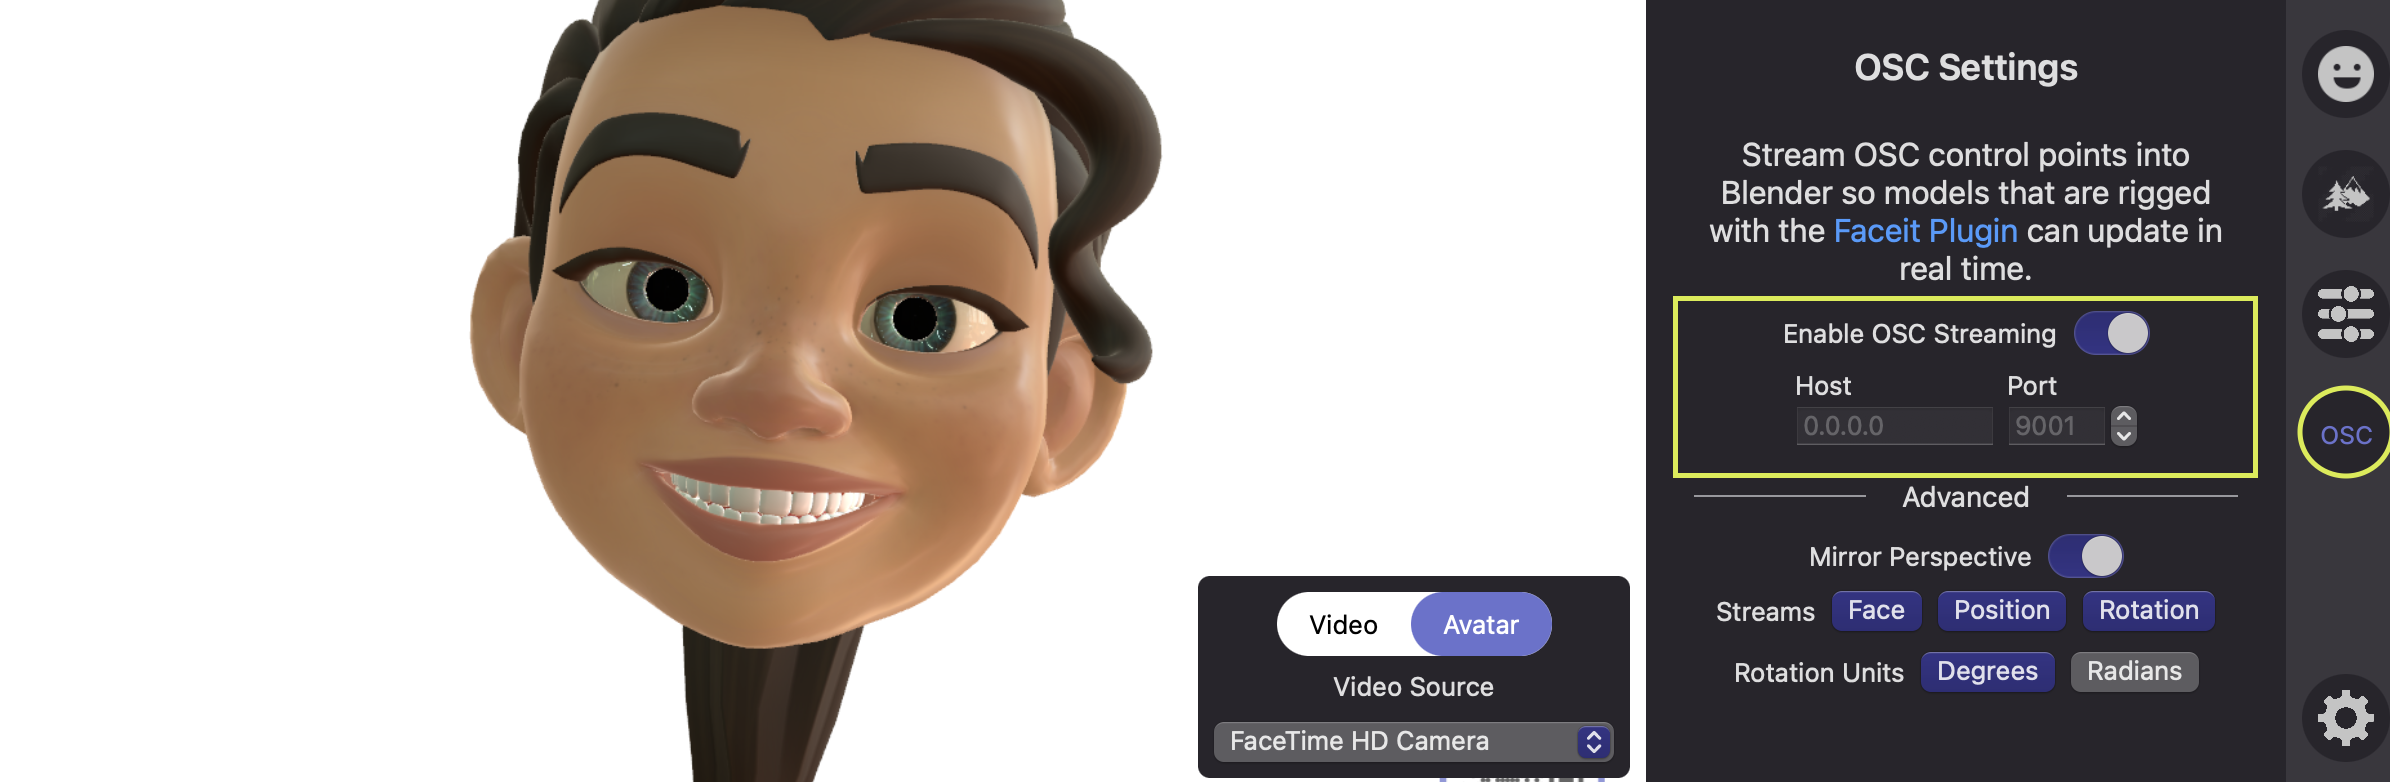
Hallway Tile
- Go to the
OSCsettings. - You can leave the
Hostfield at the default0.0.0.0. Alternatively, you may enter the IP address of your computer running Blender. - The
Portnumber should match the port number entered in Blender (default9001). - Check
Enable OSC Streaming. - It doesn't matter witch character you choose in Hallway Tile. The sent data will be the same.
- Start the receiver in Faceit.
If you are running Faceit and Tile on the same device, you can keep the default settings.
iFacialMocap
- Open
Settings. - Enter your PCs
IP addressas target in the respective field. - Default
portis 49983. Make sure that the port in Faceit and iFacialMocap match. - Start the receiver in Faceit.
You don't need to install the iFacialMocap software or the Blender add-on. Faceit can receive the data directly.
Start Capturing
- Make sure that the capturing application is sending data.
- Hit
Start Receiverin Faceit. - The character should now move in real-time.
- Hit
Stop Receiverto stop the recording. - If animation data was received, you can now import it onto your character.
Warning
The data won't be imported automatically. You need to execute the import operator after stopping the receiver.
Check the options dropdown for filtering and smoothing options.
Improve Live Performance
A laggy real-time playback does not necessarily mean that the recording is choppy. The received data is recorded on a separate thread and after importing the recorded frames to an action it should contain smooth continuos motion. It might still be desirable in many scenarious to have a smooth real-time playback. There are multiple factors that contribute to the quality and speed of real-time animation in the viewport! Read on below.
- Custom Normals and Auto Smooth:
- These functions are very demanding and can slow playback performance immensely!
- This neat little script by Artell will quickly remove them from your scene:
import bpy
def set_active_object(object_name):
bpy.context.view_layer.objects.active = bpy.data.objects[object_name]
bpy.data.objects[object_name].select_set(state=1)
for obj in bpy.data.objects:
if obj.type != "MESH":
continue
try:
set_active_object(obj.name)
except:
continue
obj.data.use_auto_smooth = False
try:
bpy.ops.mesh.customdata_mask_clear()
except:
pass
bpy.ops.mesh.customdata_custom_splitnormals_clear()
- Hide Meshes:
- Hide Objects with the Screen symbol, instead of the eye to exclude them from scene evaluation. This improves playback performance, because it reduces the amount of data that needs to be evaluated each frame.
- Hide Objects with the Screen symbol, instead of the eye to exclude them from scene evaluation. This improves playback performance, because it reduces the amount of data that needs to be evaluated each frame.
- Clean Up Weights:
- Use the Clean Vertex Groups operator to cleanup very small bone weights. This can efficiently improve scene performance.
- Use the Clean Vertex Groups operator to cleanup very small bone weights. This can efficiently improve scene performance.
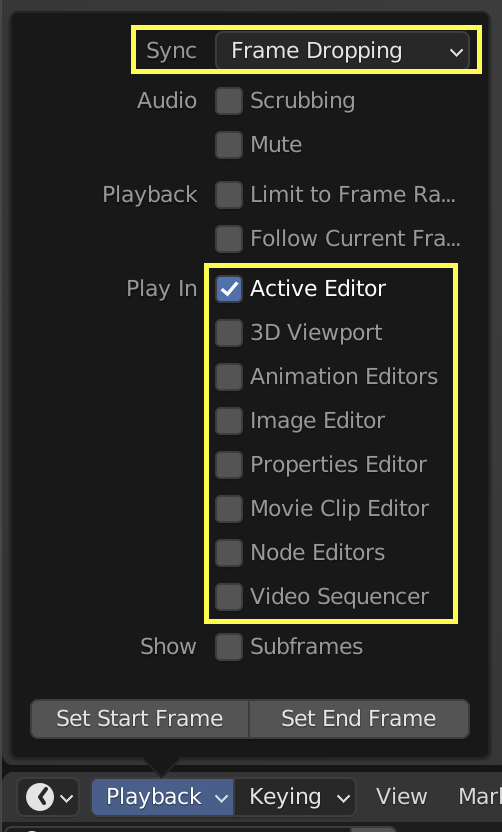
- Playback Options:
- Set the sync mode to
Frame Droppingto let Blender automatically drop frames for better playback. - Only play in the Active Editor, to prevent evaluation of animation data in all animation editors.
- Set the sync mode to
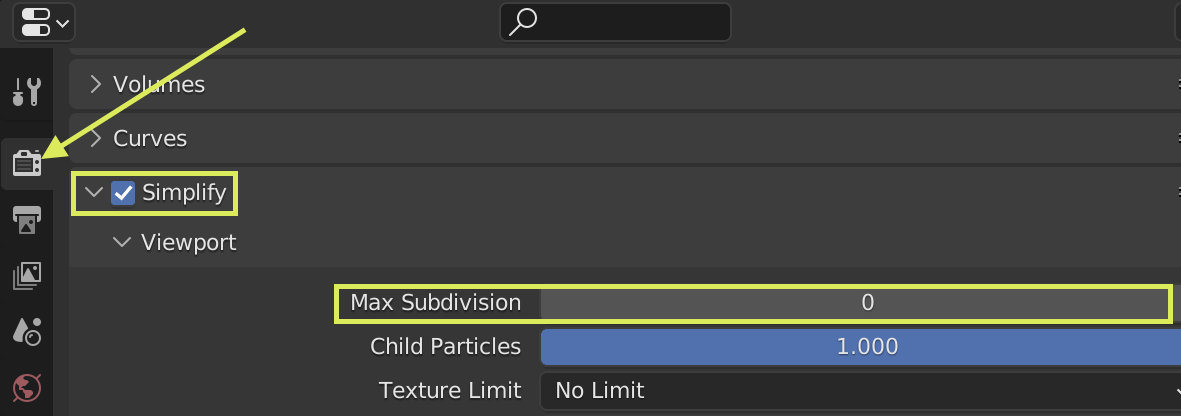
- Simplify Scene
- Maybe you have a subdivision surface modifier in the stack or a multires modifier. I like to use the simplify settings to quickly toggle all modifiers on/off. Click here to learn more about simplify settings
- Maybe you have a subdivision surface modifier in the stack or a multires modifier. I like to use the simplify settings to quickly toggle all modifiers on/off. Click here to learn more about simplify settings
- Rendermode
- Eevee shaders, and even more so Cycles viewport render, can slow down playback immensely! Check if it works faster in solid render mode.

- Eevee shaders, and even more so Cycles viewport render, can slow down playback immensely! Check if it works faster in solid render mode.
- The OSC data is streamed over your Wifi network. You should aim to optimize streaming performance. Usually this shouldn't be the bottleneck on modern setups.
Troubleshooting
Receiving animation data from the local network is quite simple, but there are a few pitfalls to be aware of.
How do I find my IP address?
It sais "No recorded Data found."
This is most likely a network issue. Make sure that you followed the Network Setup correctly. Read on below for some additional tips.
- Make sure that your PCs Firewall is not blocking connections for Blender.
- Allow/Block programs in Windows10
- Allow/Block programs in MacOS
- Make sure that both the streaming device and the PC running Blender are in the same local network. If you are unsure if the devices are in the same network you can quickly execute a ping test and check if it is successful.
- Read all about address & port configuration here.
Help! The network performance is bad / laggy / choppy!
- If the performance is bad and you are sure that it is related to the network, it might help to restart the router and give it some time to cool off.
- Bad performance might also be caused by the scene complexity in Blender. Read more about optimizing performance here.
- Lastly, if you are using Face Cap, your iPhone might be the bottleneck. The phone running hot can impact the stream performance. Giving it some time to cool down between shots can help.