Control Rig
What's That?
The ARKit Control Rig is a bone rig that can be used to control the 52 ARKit shape keys with much more flexibility and artistic control. The Control Rig is connected to all Target Shapes via complex Drivers and you can immediately start to animate the face by either keyframe animation or recorded performance capture files.
Animate the ARKit Expressions with the Control Rig
Generate Control Rig
The Control Rig is created based on the Faceit Landmarks. The Drivers that connect the bones to the shape keys are generated automatically on time of creation. You can always reconnect them later.
Generate and Connect the Control Rig by the click of a button.
If you choose to apply the scale on time of creation, the Transforms on the Control Rig will be clean. Scale: (1, 1, 1), but the slider ranges (min, max) will be arbitrary floating point numbers. This shouldn't be an issue in animation, but it might be desirable to have clean slider ranges.
Control Rig Settings
Both the target objects and the target shape keys are stored on the control rig, once generated. This is especially useful if you are animating multiple control rigs in one scene or if you are using linking workflows.
- The target objects are populated based on the objects list in the Setup panel.
- The target shapes are populated from the ARKit target shapes list. Eventual custom controllers are populated automatically.
Both lists can be altered manually. If you can't see the target shapes or target objects panel, it might well be that you have to perform a control rig update. The operator Load to Control Rig will clear the current settings and attempt to load the scene settings. Respectively, the Load to Scene operator attempts to populate the scene settings.
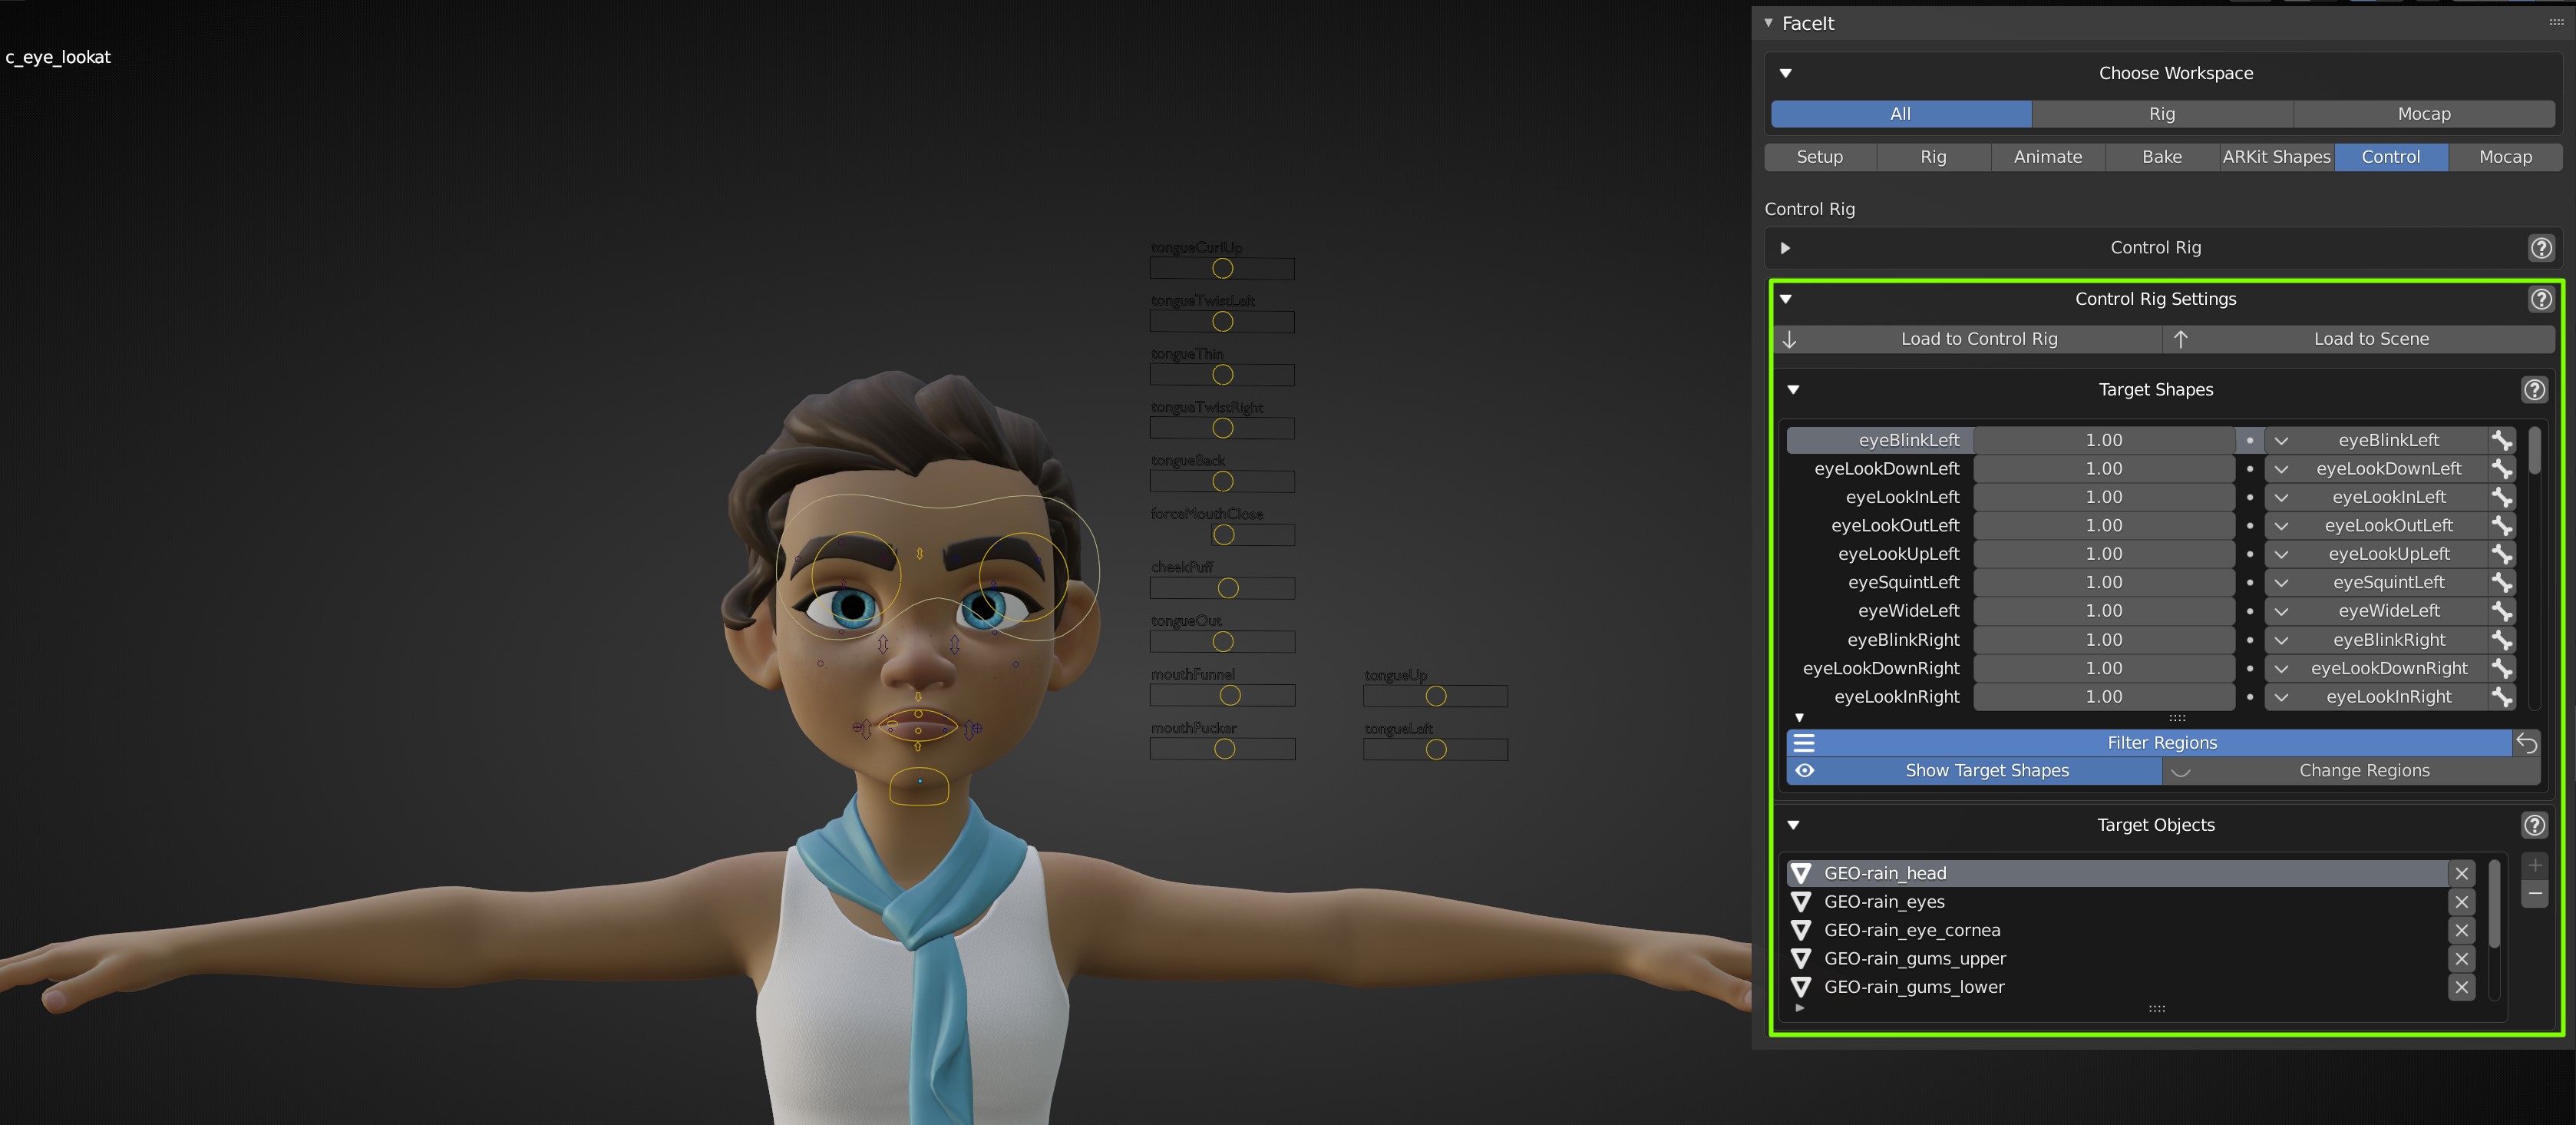
The target shapes and target objects are stored on the control rig object.
Connect / Disconnect
You can connect and disconnect the Control Rig quickly and non-destructively! Both the animation on your shape keys and the animation on the Control Rig will be preserved.
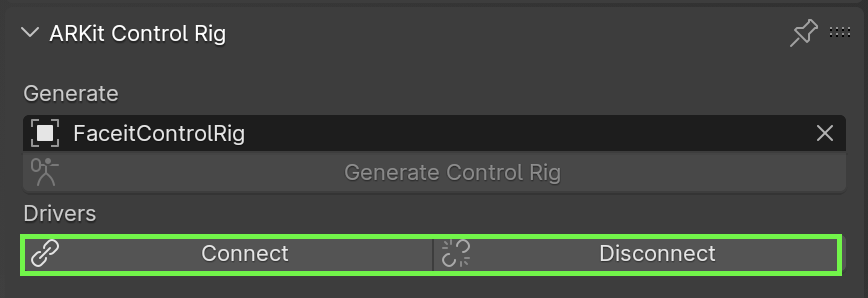
Non-destructively connect or disconnect the drivers at any point.
Set Child Of
If you want the control rig to follow the motion of your character, you can set up a child of constraint with Set Child Of operator. If the head bone is specified in the mocap setup panel, the child of constraint will be created automatically. The 2D sliders are kept in place. If you want them to follow the head bone as well, you can create a similar constraint manually.
Quickly set the control rig as child of the head bone.
Tip
Select both rigs before going to pose mode to avoid switching modes when animating.
Update Control Rigs
Outdated Control Rigs can be updated with a single click.
Bake Animations
As the control rig is merely controlling the shape keys via drivers, the animation data is not actually saved on the shape key data block. If you want to bake the animation data to the actual shape keys, you can do so with the bake operators in the control tab.
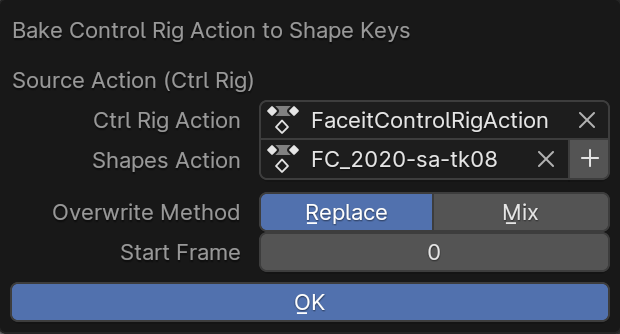
From Control Rig
Options for baking a Control Rig Action to shape keys.From Shape Keys
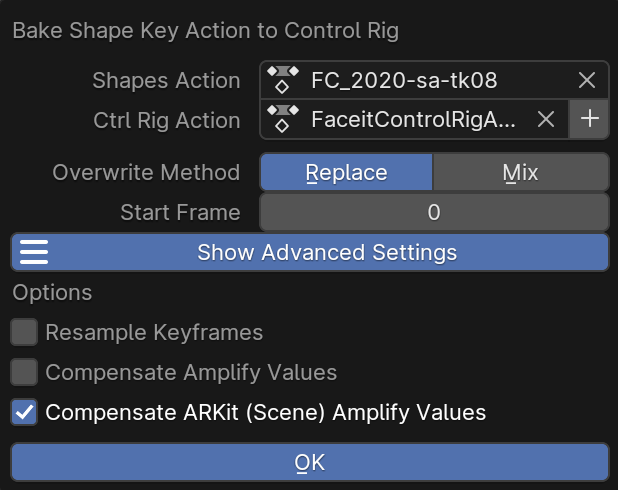
You can bake animation data from shape keys to the control rig. This is exactly what happens when you execute the import mocap operators and allows to non-destructively go back and forth between control rig and shape key animation. There shouldn't be a visual difference between the two types, unless you mess with the
compensate amplify valuesoptions.
Options for baking a Shape Key Action to the Control Rig.Advanced Options
- Resample Keyframes:
- Resampling will add a keyframe on each frame on the timeline (depending on the chosen framerate). The old frames will be overwritten.
- Note that you can loose details in your animation, if you recorded at a 100fps and your scene is only set to 24 fps.
- Resampling can be really useful on sparsely keyframed or hand-keyed motions, because no detail will be lost after baking!
- Compensate Amplify Values:
- The Amplify values that are currently specified will effect the baked animation immediately.
- If this is enabled the amplify values will be inverted during bake, resulting in a one to one bake, even though amplify values are set to non-default values.
Animation Layers
Checkout the amazing Add-on by Tal Hershko, for an easy to use Animation Layers system

Animate on top a performance capture clip with an additive animation layer.
Amplify Expressions
The Amplify list is a flexible and powerful way to edit your control rig animations! You can amplify animation values on the fly and during playback. They are also animatable, so you can even amplify individual frame ranges.
Tip
Extend the maximum slider range of your shape keys to amplify the expressions beyond the default range of motion [0,1]!
Quickly amplify any Control Rig Slider Value to edit your animations!
Custom Controllers
You can add any number of custom controllers to animate extra shapes, that you want to have available in the rig. For the Custom Controller setup is limited to simple sliders.
Quickly add Custom Controllers for any kind of Shape Key on all registered Objects.
Warning
Existing drivers on the shape key value will be removed, as soon as they are targeted by a custom slider bone!
Link Control Rigs
Linking is a very useful tool, that allows to use content from other .blend files without altering the original data. In the context of character animation it can be used to separate the rigging process from the animation process. Read more here
Mutliple Characters in One Scene
Linking multiple control rigs into one scene allows to animate multiple characters. This works, because the target objects and expressions are stored on the control rig objects. The normal registration of the objects in the setup panel and the shape keys in the target shapes tab can be skipped. It's recommended to animate in a separate scene, when using multiple characters.

Faceit will automatically set the selected control rig as the active one, making it the target for mocap imports.
Best Practice
- Create a character collection (eg. CH_your_characters_name)
- Add all animated objects the control rig that you want to link and anything else that you need to animate to this collection. Sub collections, like GEOMETRY, RIG, etc. are no problem.
- In a new scene, go to File > Link > Select the rigging .blend file > Collections >
Your Collection. - After linking, all objects are frozen. To make the armature editable, you need to create so called overrides.
- Click on one of the linked objects and go to Objects > Relations > Make Library Overwrite... or do it from the outliner and override the whole collection.
- Your can now start animating!
- Note that updates, or other changes to the rig have to be made in the original file (the so called library).
Tip
This is just best practice advice. You can use any linking/appending workflow that works for you.