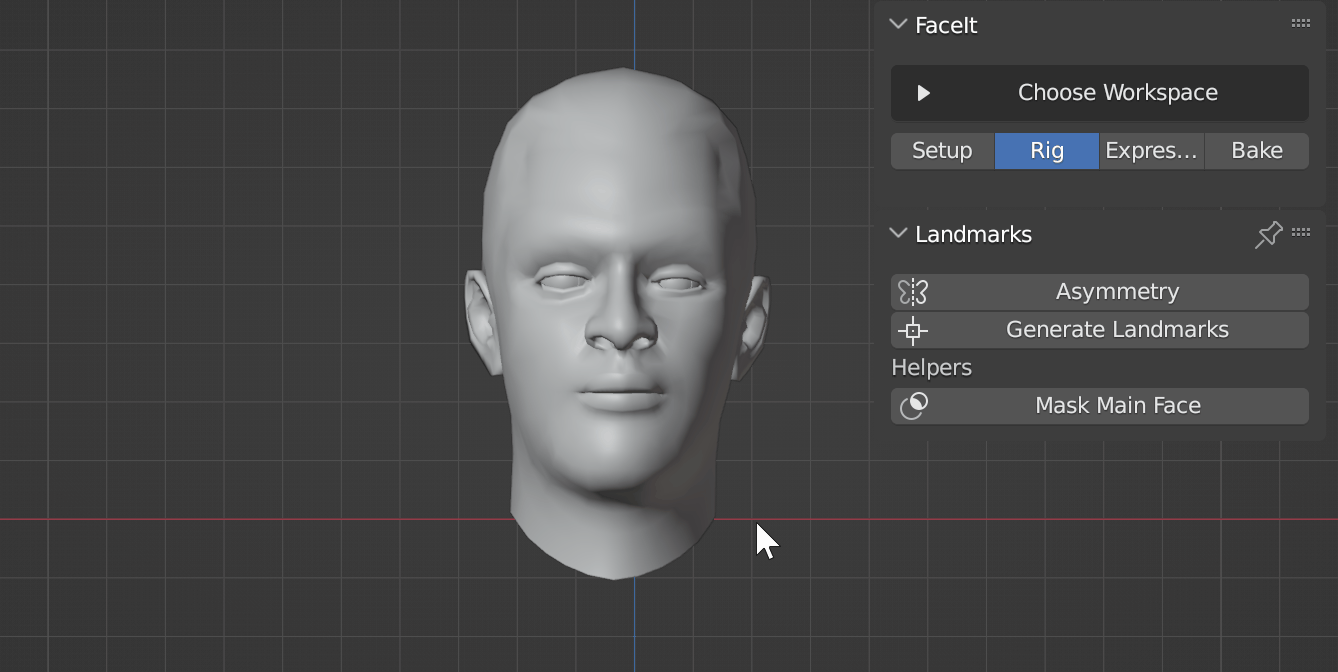
Landmarks
This section will cover the process of placing the landmarks on the characters face. The landmarks directly influence the bone placement and have a huge impact on the quality of deformation and the resulting expressions.
Non-Destructive Rigging
The process of rigging in Faceit is non-destructive. If the deformation produces artefacts or some of the expressions don't look as expected, it is likely that you can produce better results by refining the landmarks. You can go back and forth without loosing any progress.
Landmarks Placement
The modal operator Generate Landmarks will guide you through a rough positioning and scaling of the landmark. You don't have to be overly accurate in this step. The landmark placement will be refined in the next step.

The process of placing the landmarks in a modal operator
Asymmetry
Enable the asymmetry option if your character is not modelled symmetrical or offset from the center. The initial placement won't be constraint to the Y axis and will include a rotation step.
Prepare Projection
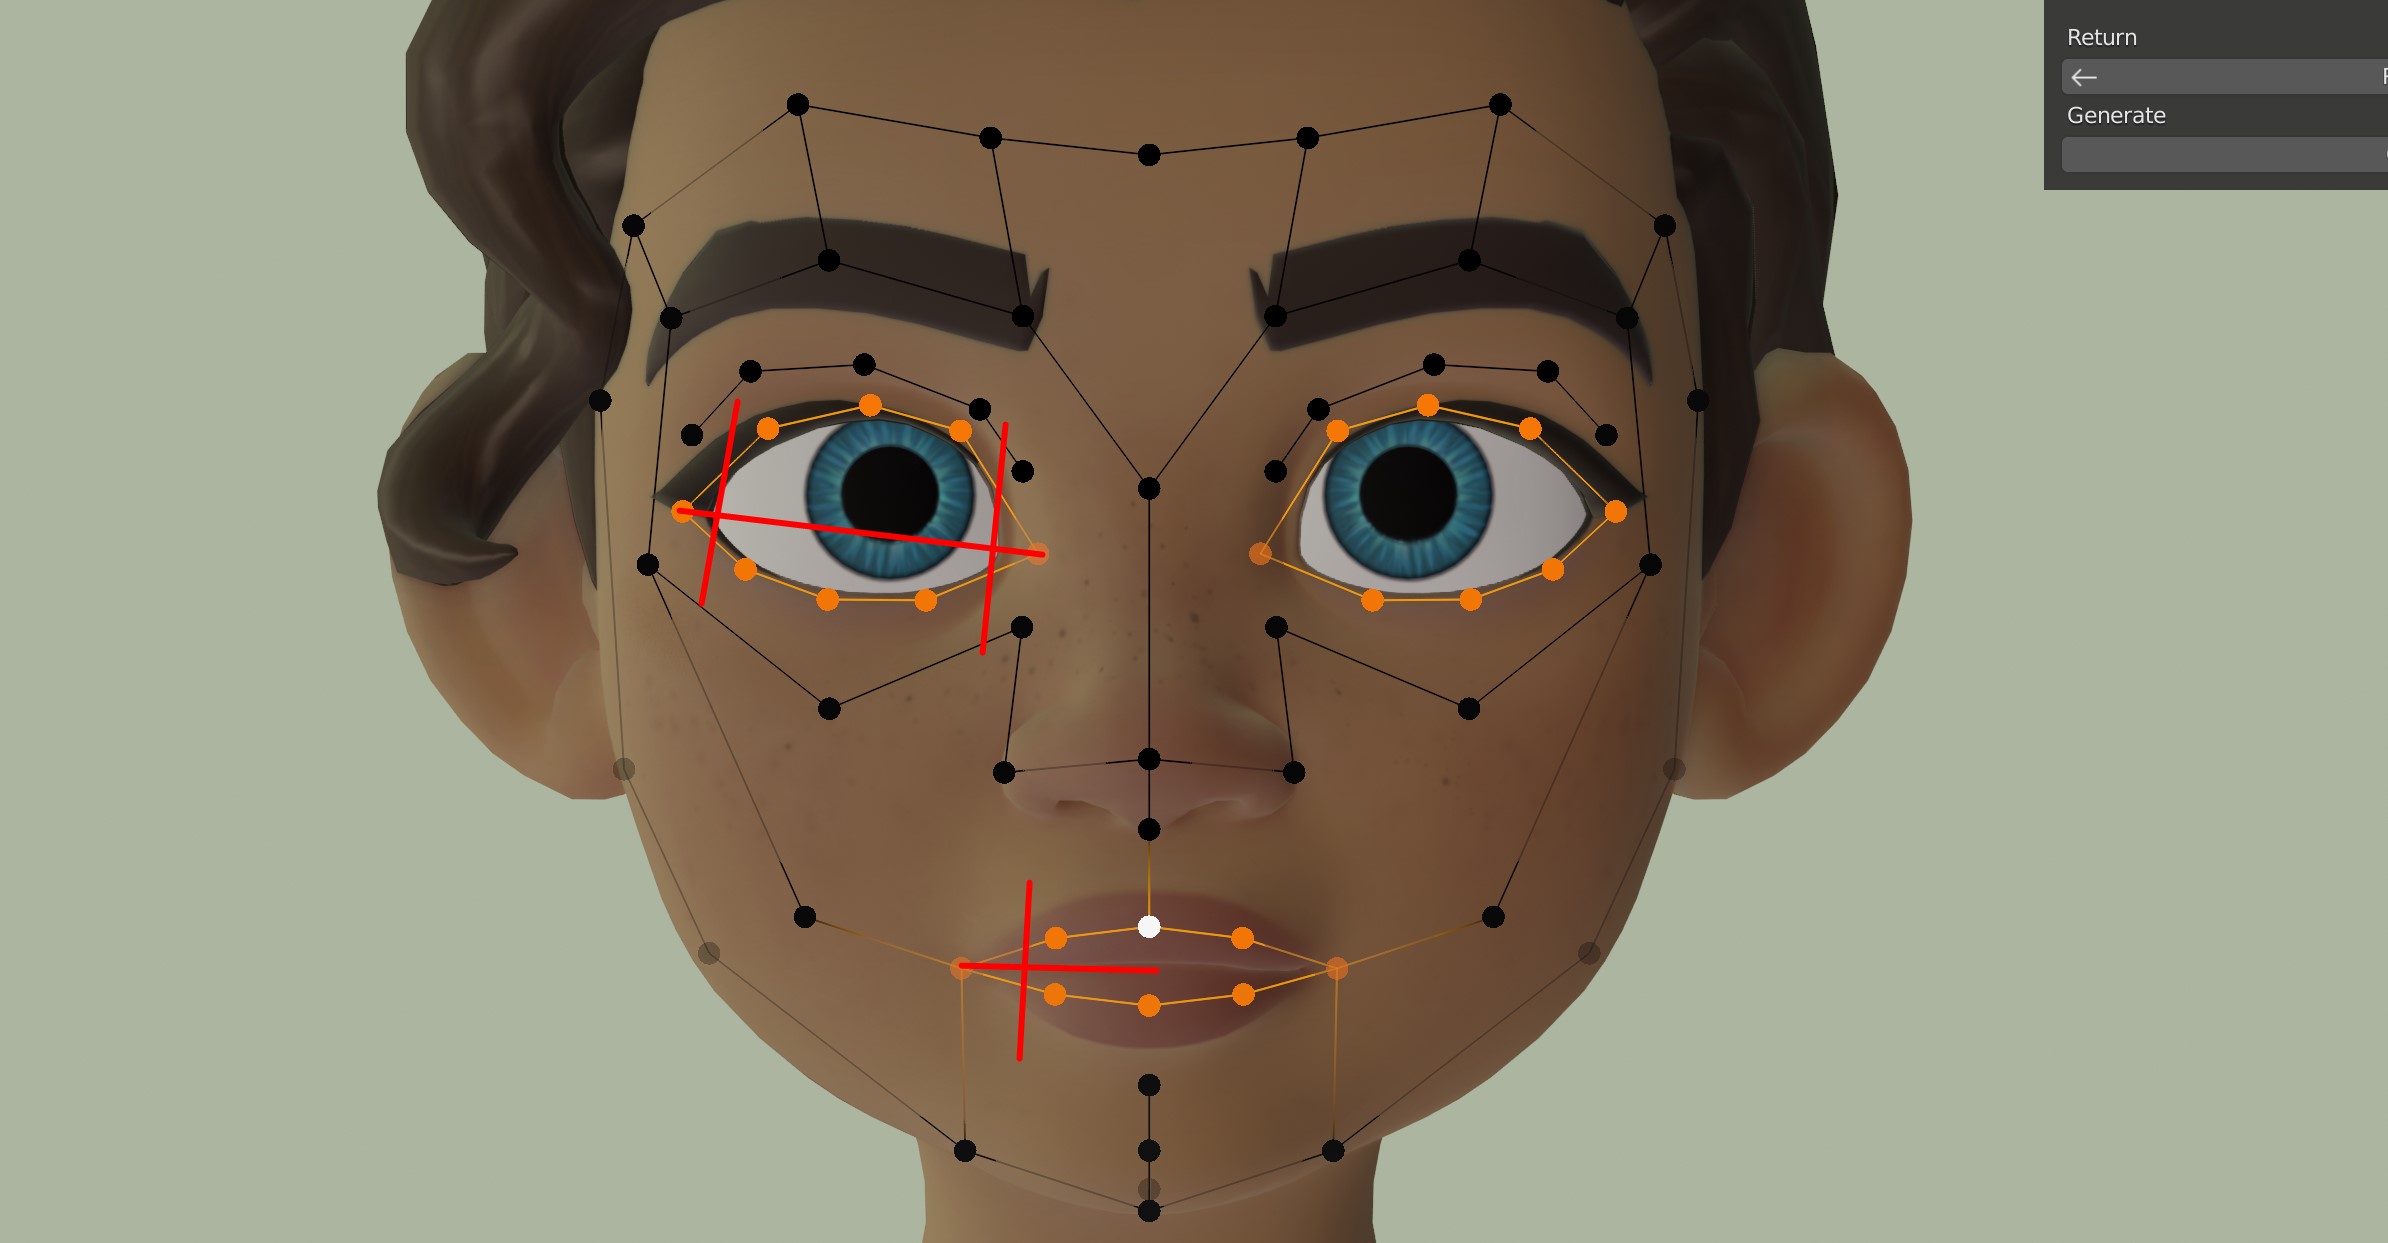
Before projecting the landmarks onto the face they need to be aligned with the characters face from front view. Take a close look at the Examples provided below, if you are unsure how to place the vertices!
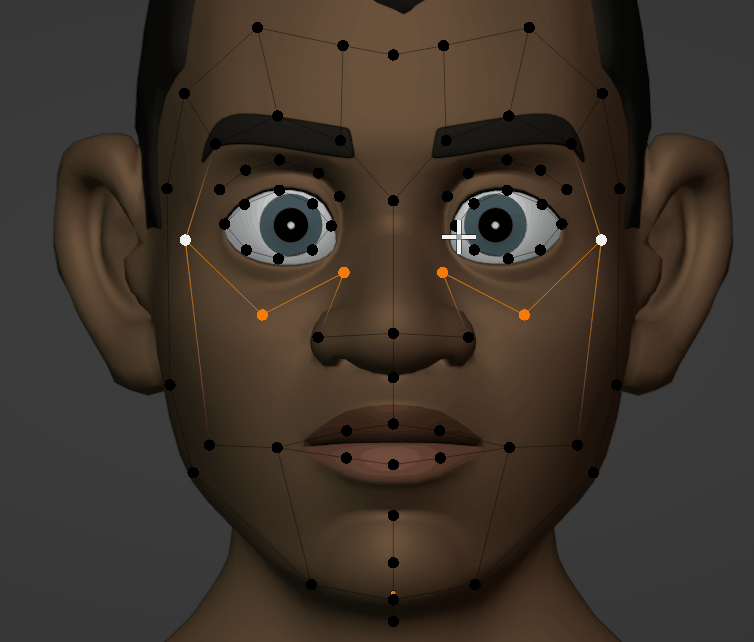
Move the Vertices from frontal view, to match your characters face as close as possible in this step! leaving some space to the corners of eyes and lips can improve deformation in these areas.
Asymmetry
Most asymmetric characters still have some symmetrical elements. You can choose vertex by vertex if you want to mirror the placement or not. Use the Asymmetry options in the Landmark Helpers.
Mirror can be disabled for asymmetric landmarks.
You can mirror all vertices manually by using the Mirror Selected Vertices operator.
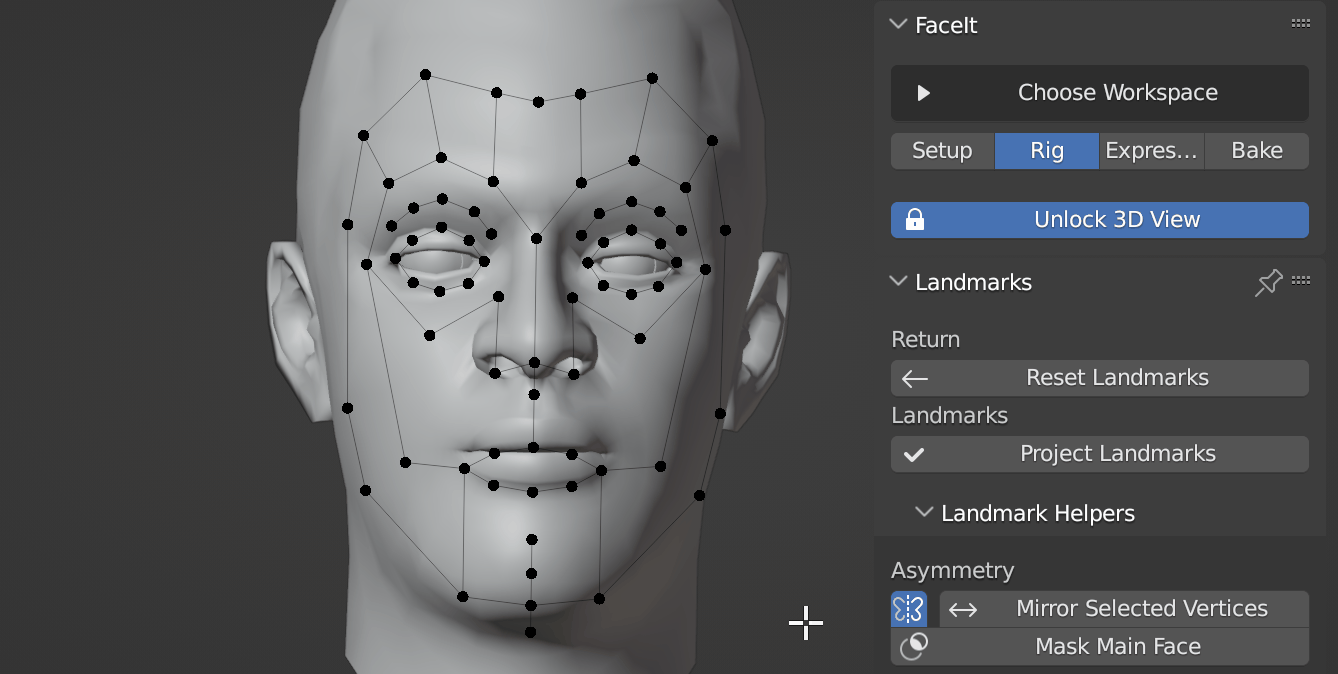
Project Landmarks
The Project Landmarks operator projects the landmarks mesh in frontal direction (Y) onto the characters face geometry. The main vertex group is used as the target surface for the projection.
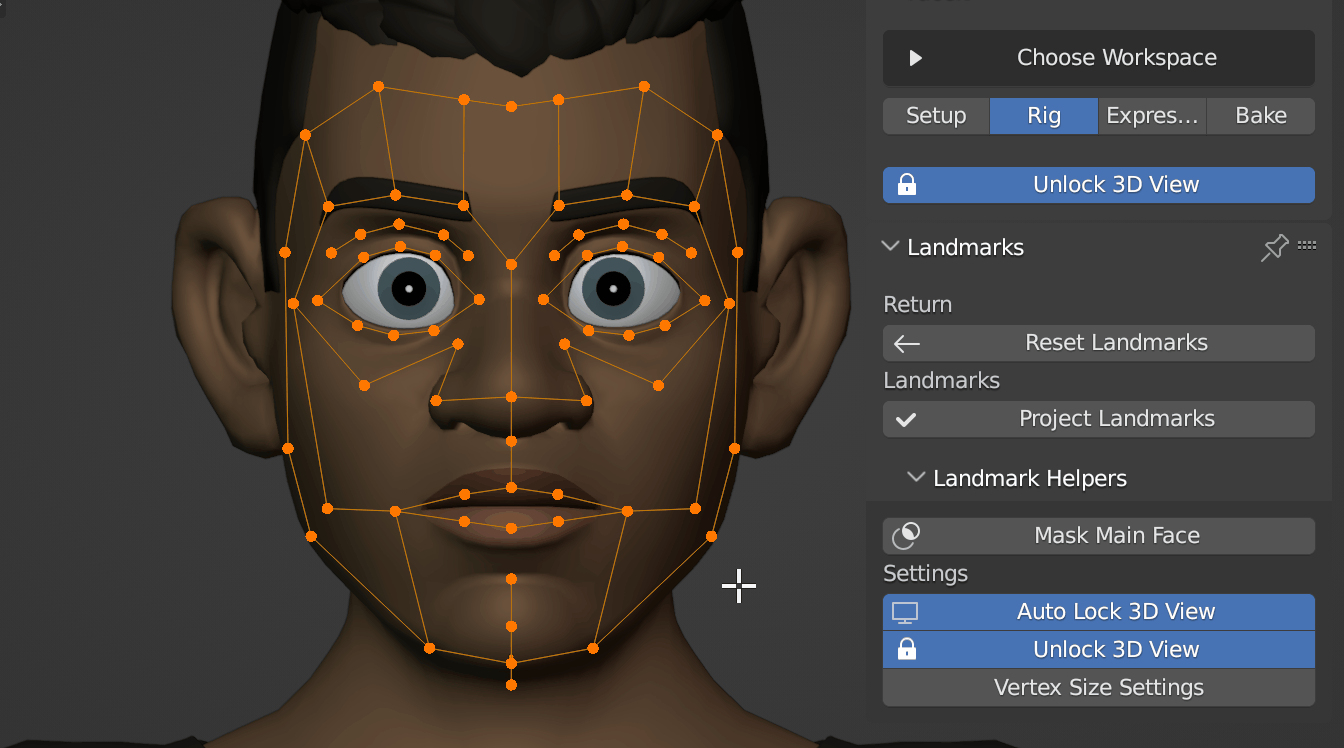
Project the vertices onto the main face object. (Only Y Axis). Afterwards, orbit around your model and refine the landmark positions from all angles.
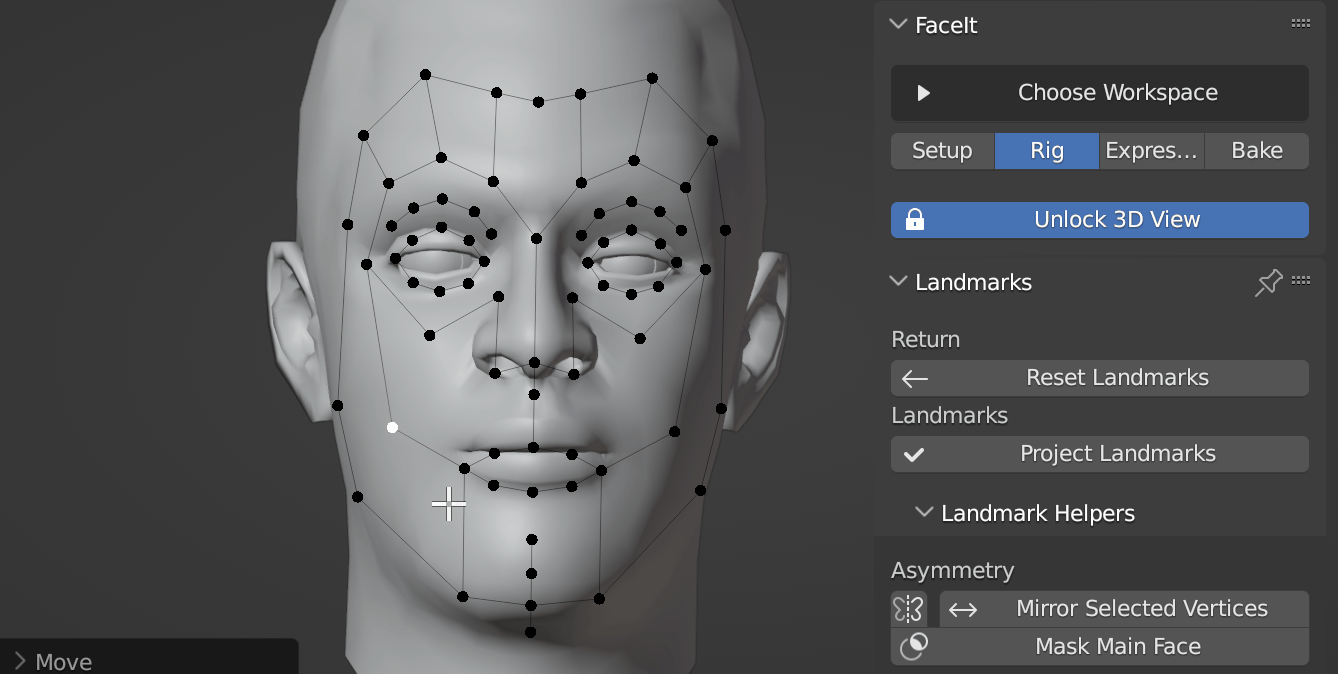
Final Landmark Placement
As the landmarks are only projected on one axis (Y), you should refine all vertex positions with care. Check the landmarks from front and sideview and orbit around the geometry to make sure that the landmarks are placed accurately.
 The placement around chin and jaw area should always be double checked after the projection.
[Examples of eyes, lips, below chin!]
Pivot Settings
The Create Locator Empties operator allows to accurately specify the position for the eye and jaw bones. Faceit will usually do a good job of finding the optimal pivot point automatically. You can change these settings at any point.
Sometimes it's easiest to use existing vertex groups for finding the correct pivots.
You can overwrite the automatic pivot placement by switching to manual mode. The creates two vertices in the landmarks mesh.
If your model has flat eyes, which is common for many anime models the pivot is usually lying far in the rear of the head. Often it's easiest to copy the pivot points from existing eye bones, because most models come with an attached armature. See the VROID model below for reference:

Set the Geometry Type to Flat and specify the armature and eyebones.
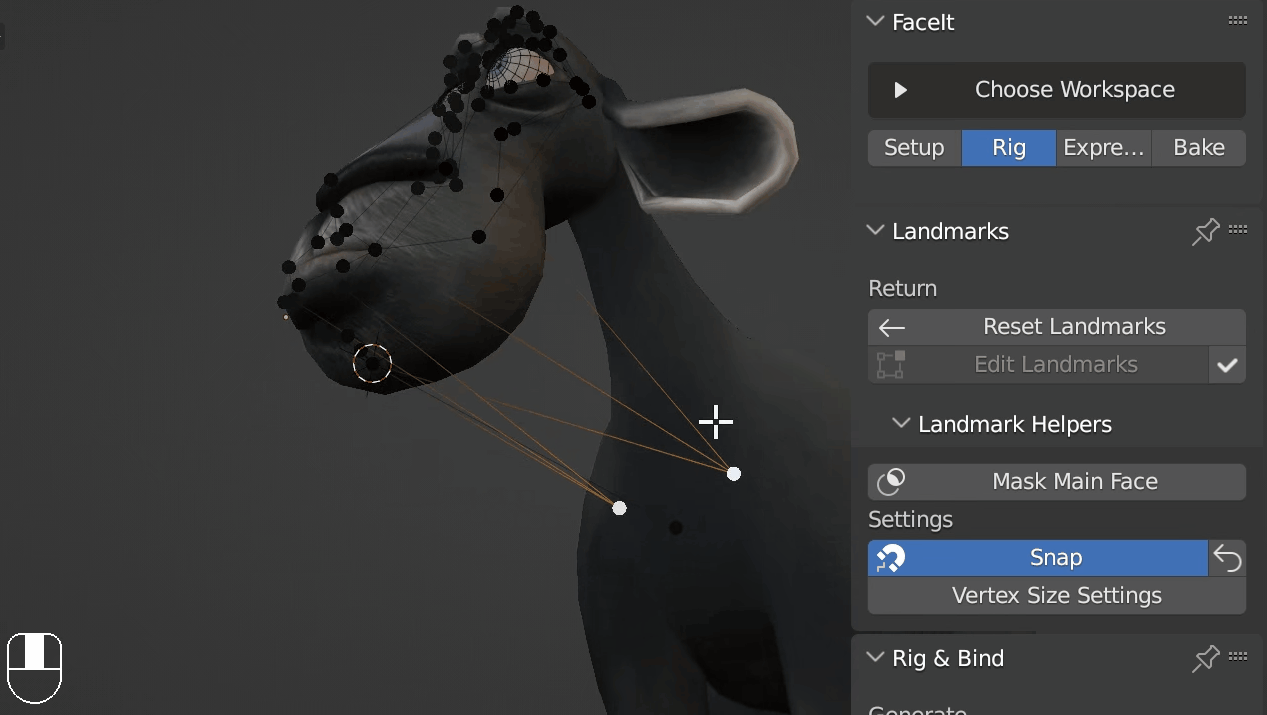
Mask Main Face
The Mask Main Face operator hides all geometry except the Main Face Group. This can be very helpful for accurately snapping the landmarks to the face, when eyelashes or brows are obscuring the view. The operator hides both objects and parts of the mesh temporarily.
Quickly hide geometry for accurate landmark snapping.
Examples
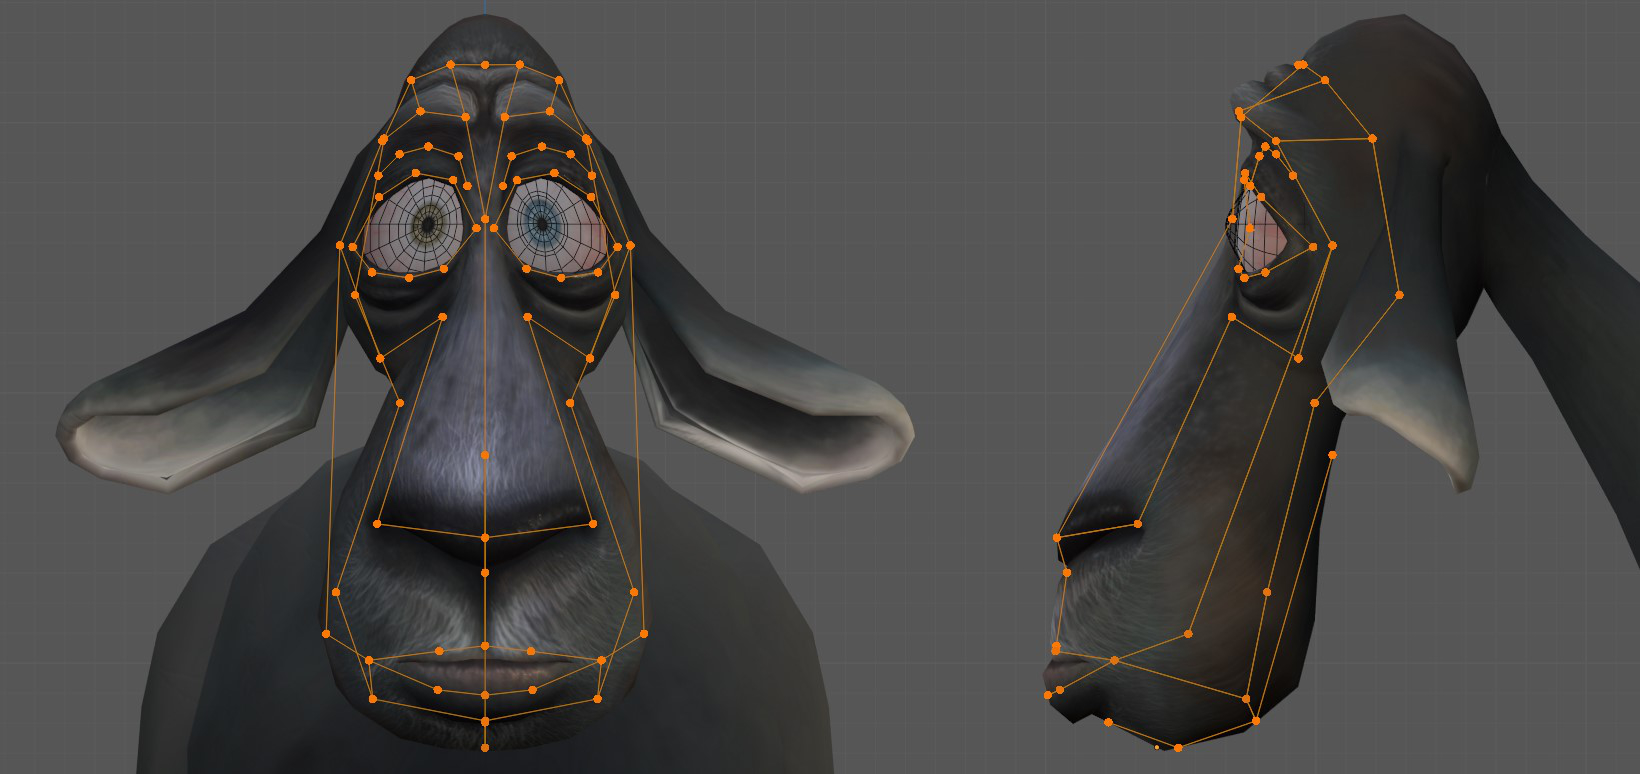
Example of Proog
Placing the landmarks can get quite complex for some models. Sometimes it's not possible to get a perfect placement from front view. It's all the more important to take time after the projection. Frank the sheep can be downloaded from Blender Studio
Example of the placement for asymmetric characters. Note, that the landmarks are slightly rotated to begin with. The mirror can be disabled to ensure that both sides are placed accurately.
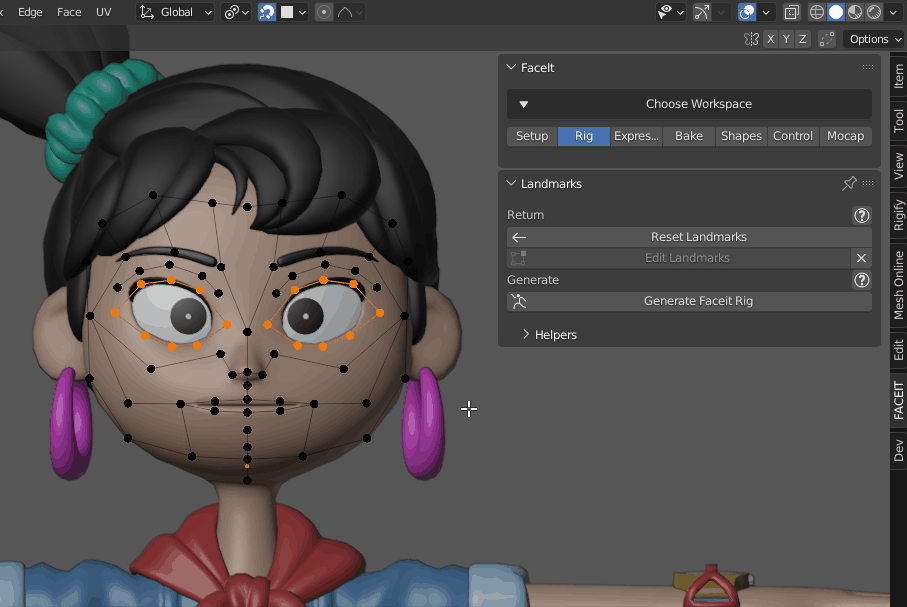
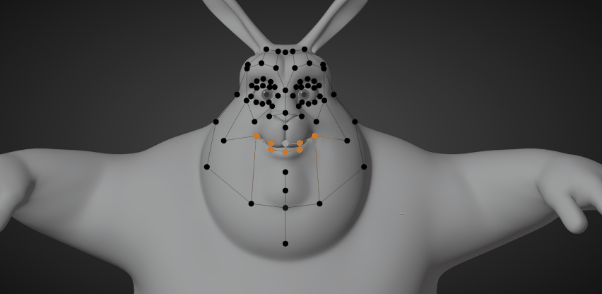
Example of placing the landmarks on a VROID character
 Note the landmarks along the Jawline to the ear and from the lips down to the neck. It is important to be accurate here!
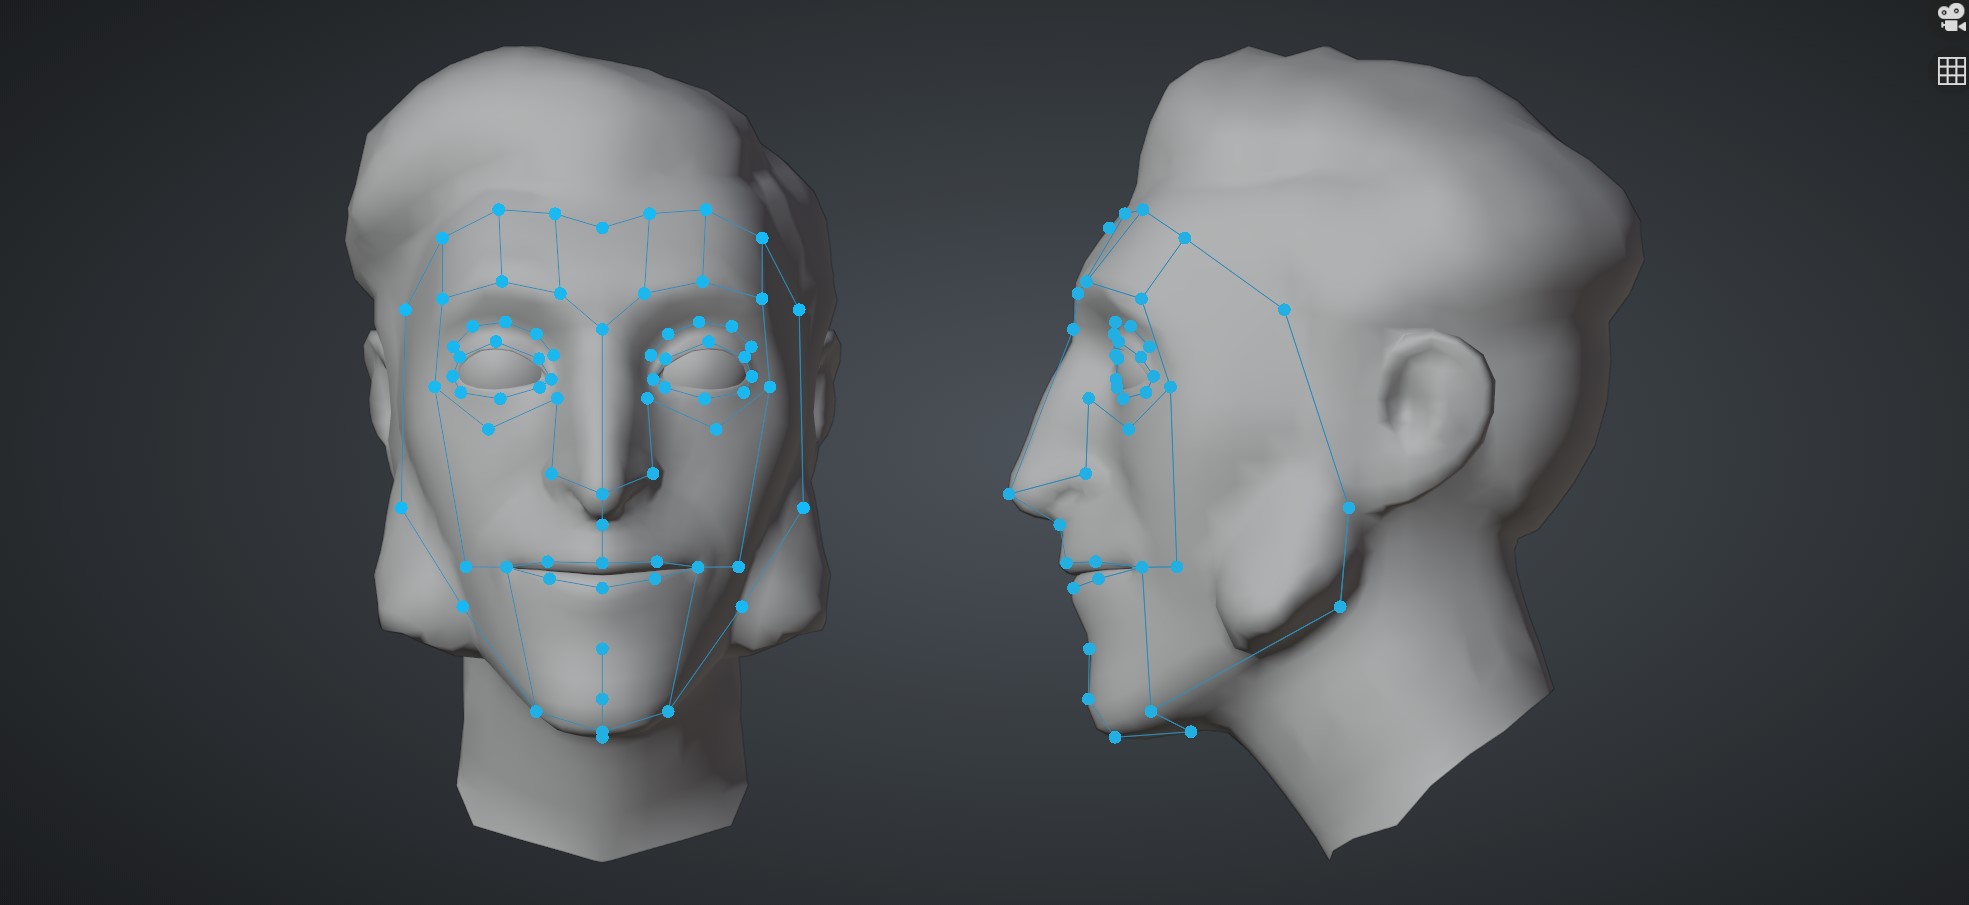
For this particular character, with it's awesome beard, I had to inset the jawline a bit to match the actual skin of the character! Turn off Face Snapping to move vertices beneath the surface.
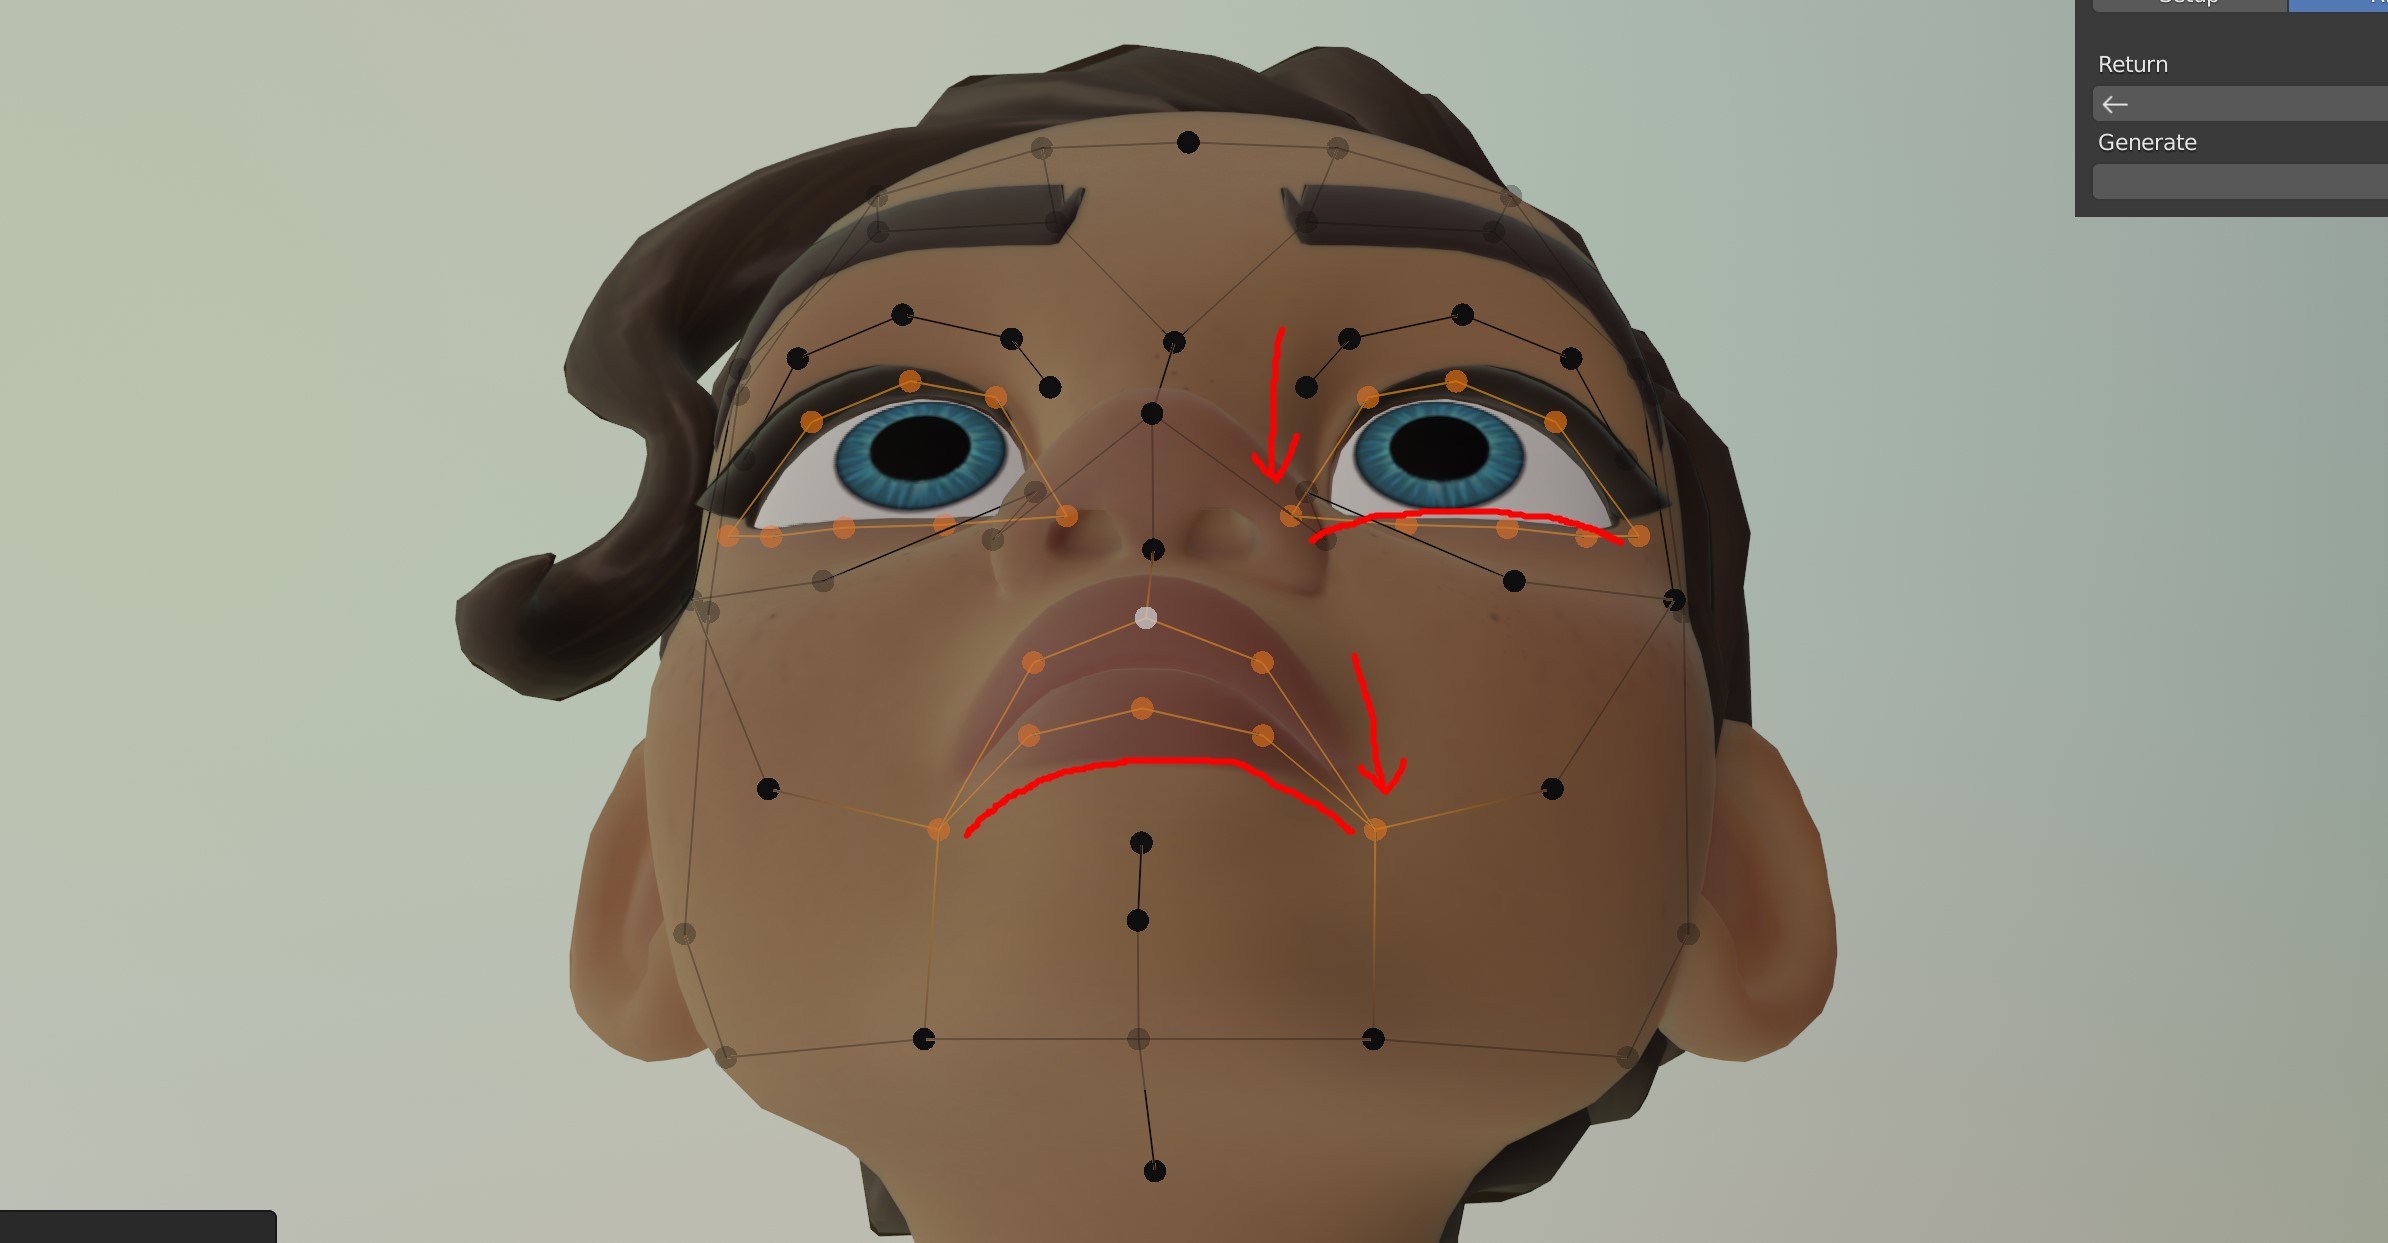
slightly insetting the corners of lips and lids will give better deformation results. Follow the natural curvature.
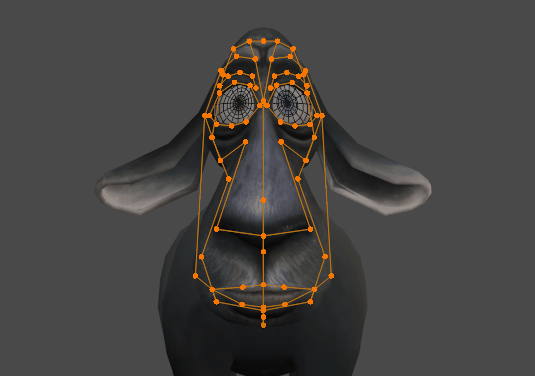
*Frank - Example of anthropomorphic character. *
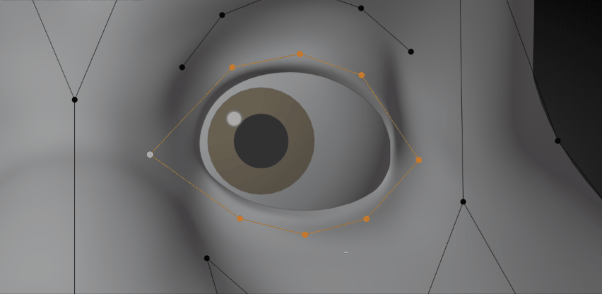
Another example of eye landmarks. The corners are inset to follow the natural lid curvature
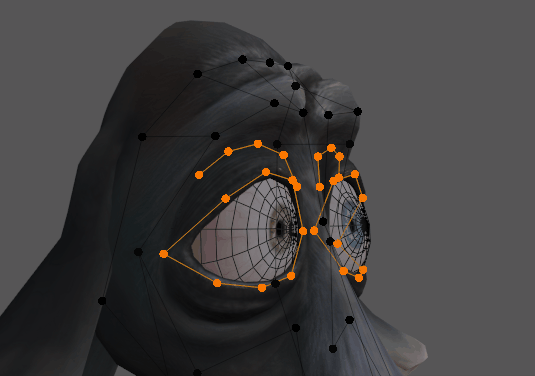
Leave some horizontal space between the corners of the lips and lids and the landmarks corners.
Lips landmarks. The corners are inset to follow the natural lip curvature